One of the most important aspects of man-to-man defense is stopping players from cutting to the basket wide open. When teaching man-to-man defense, I cover closeouts first and then I teach stopping cuts second. Closeouts are the primary focus with on the ball defense. Stopping cuts are one the primary focuses of help side defense moving into one pass away defense.
An offensive player that is able to cut freely to the basket is likely to be able to receive a pass in a great position to score the ball. Stopping cuts prevents offensive players from getting into a good scoring position within the defense.
How to Stop a Cut?
Stopping cuts defensively is about being physical enough to force the offensive player to cut away from the ball and not towards the ball. The first part of stopping a cut is being in the correct position. The defender must be between their man and the basketball.
As a help side defender this is easy. The defender should be in help side defense putting them in the correct position to stop any cuts by their man.
Moving from on the ball defense to stopping a cut is a bit harder. The defender should “jump to the pass” as soon as their man makes the initial pass. This movement towards the ball puts the defender into the correct position to stop the cut.
This drill will work on both aspects of stopping the cut. It will work on both jumping to the ball with the on the ball defense as well as stopping the cut from a help side defensive position. The drill can also be broken into 2 separate drills to focus on stopping the cut from either on the ball defense or help side defense.
Once a defender is in the proper position, they then have to physically stop the cut. This involves using the defender’s body to restrict the offensive player from cutting in front of the defender. The physically nature of stopping a cut involves three body parts of the defender.
1.The feet must be set with the foot closer to the ball up and the foot farther away from the ball back. This position invites the offensive player to run by the defender in a direction away from the ball behind the defender. The defender should be between their man and the ball so the defender needs to be moving their feet during the cut to stay in this position.
2. The second body part are the arms. The inside arm is going to be extended to prevent any passes to the cutter. If a pass is made, then the inside extended arm should be able to get a deflection on the pass. This front arm and feet working together helps to keep the defender in the correct position.
The back arm or arm farther away from the ball is going to be tucked into the defender’s body. The arm can not be extended away from the defender’s body because the refs are looking for extended arms in calling fouls. With the arm kept right against the defender’s body, the refs should allow the defender to use it as long as it stays close to the body.
The arm is going to make contact with the offensive player and with subtle movements try to guide the offensive player to cut behind the defender. The arm can help the defender brace against the contact of the offensive player making it easier to stay in the proper position.
3. The last body part is the chest of the defender. The arm helps to initiate contact with the offensive player while the chest of the defender allows the defender to maintain contact through the entire cut. The chest is used to help prevent possible fouls. Refs are looking for hands and arms extended away from the body to call off the ball fouls. By keeping the arm tucked into the body and using the chest instead of the arms, the defender can play physical defense without getting fouls called on them. This is how a defender can play physically without getting a bunch of fouls called on them.
Stopping the Cut Drill
The drill can be separated into two parts and at times I do separate it but it also can be combined to cover both aspects of stopping cuts.
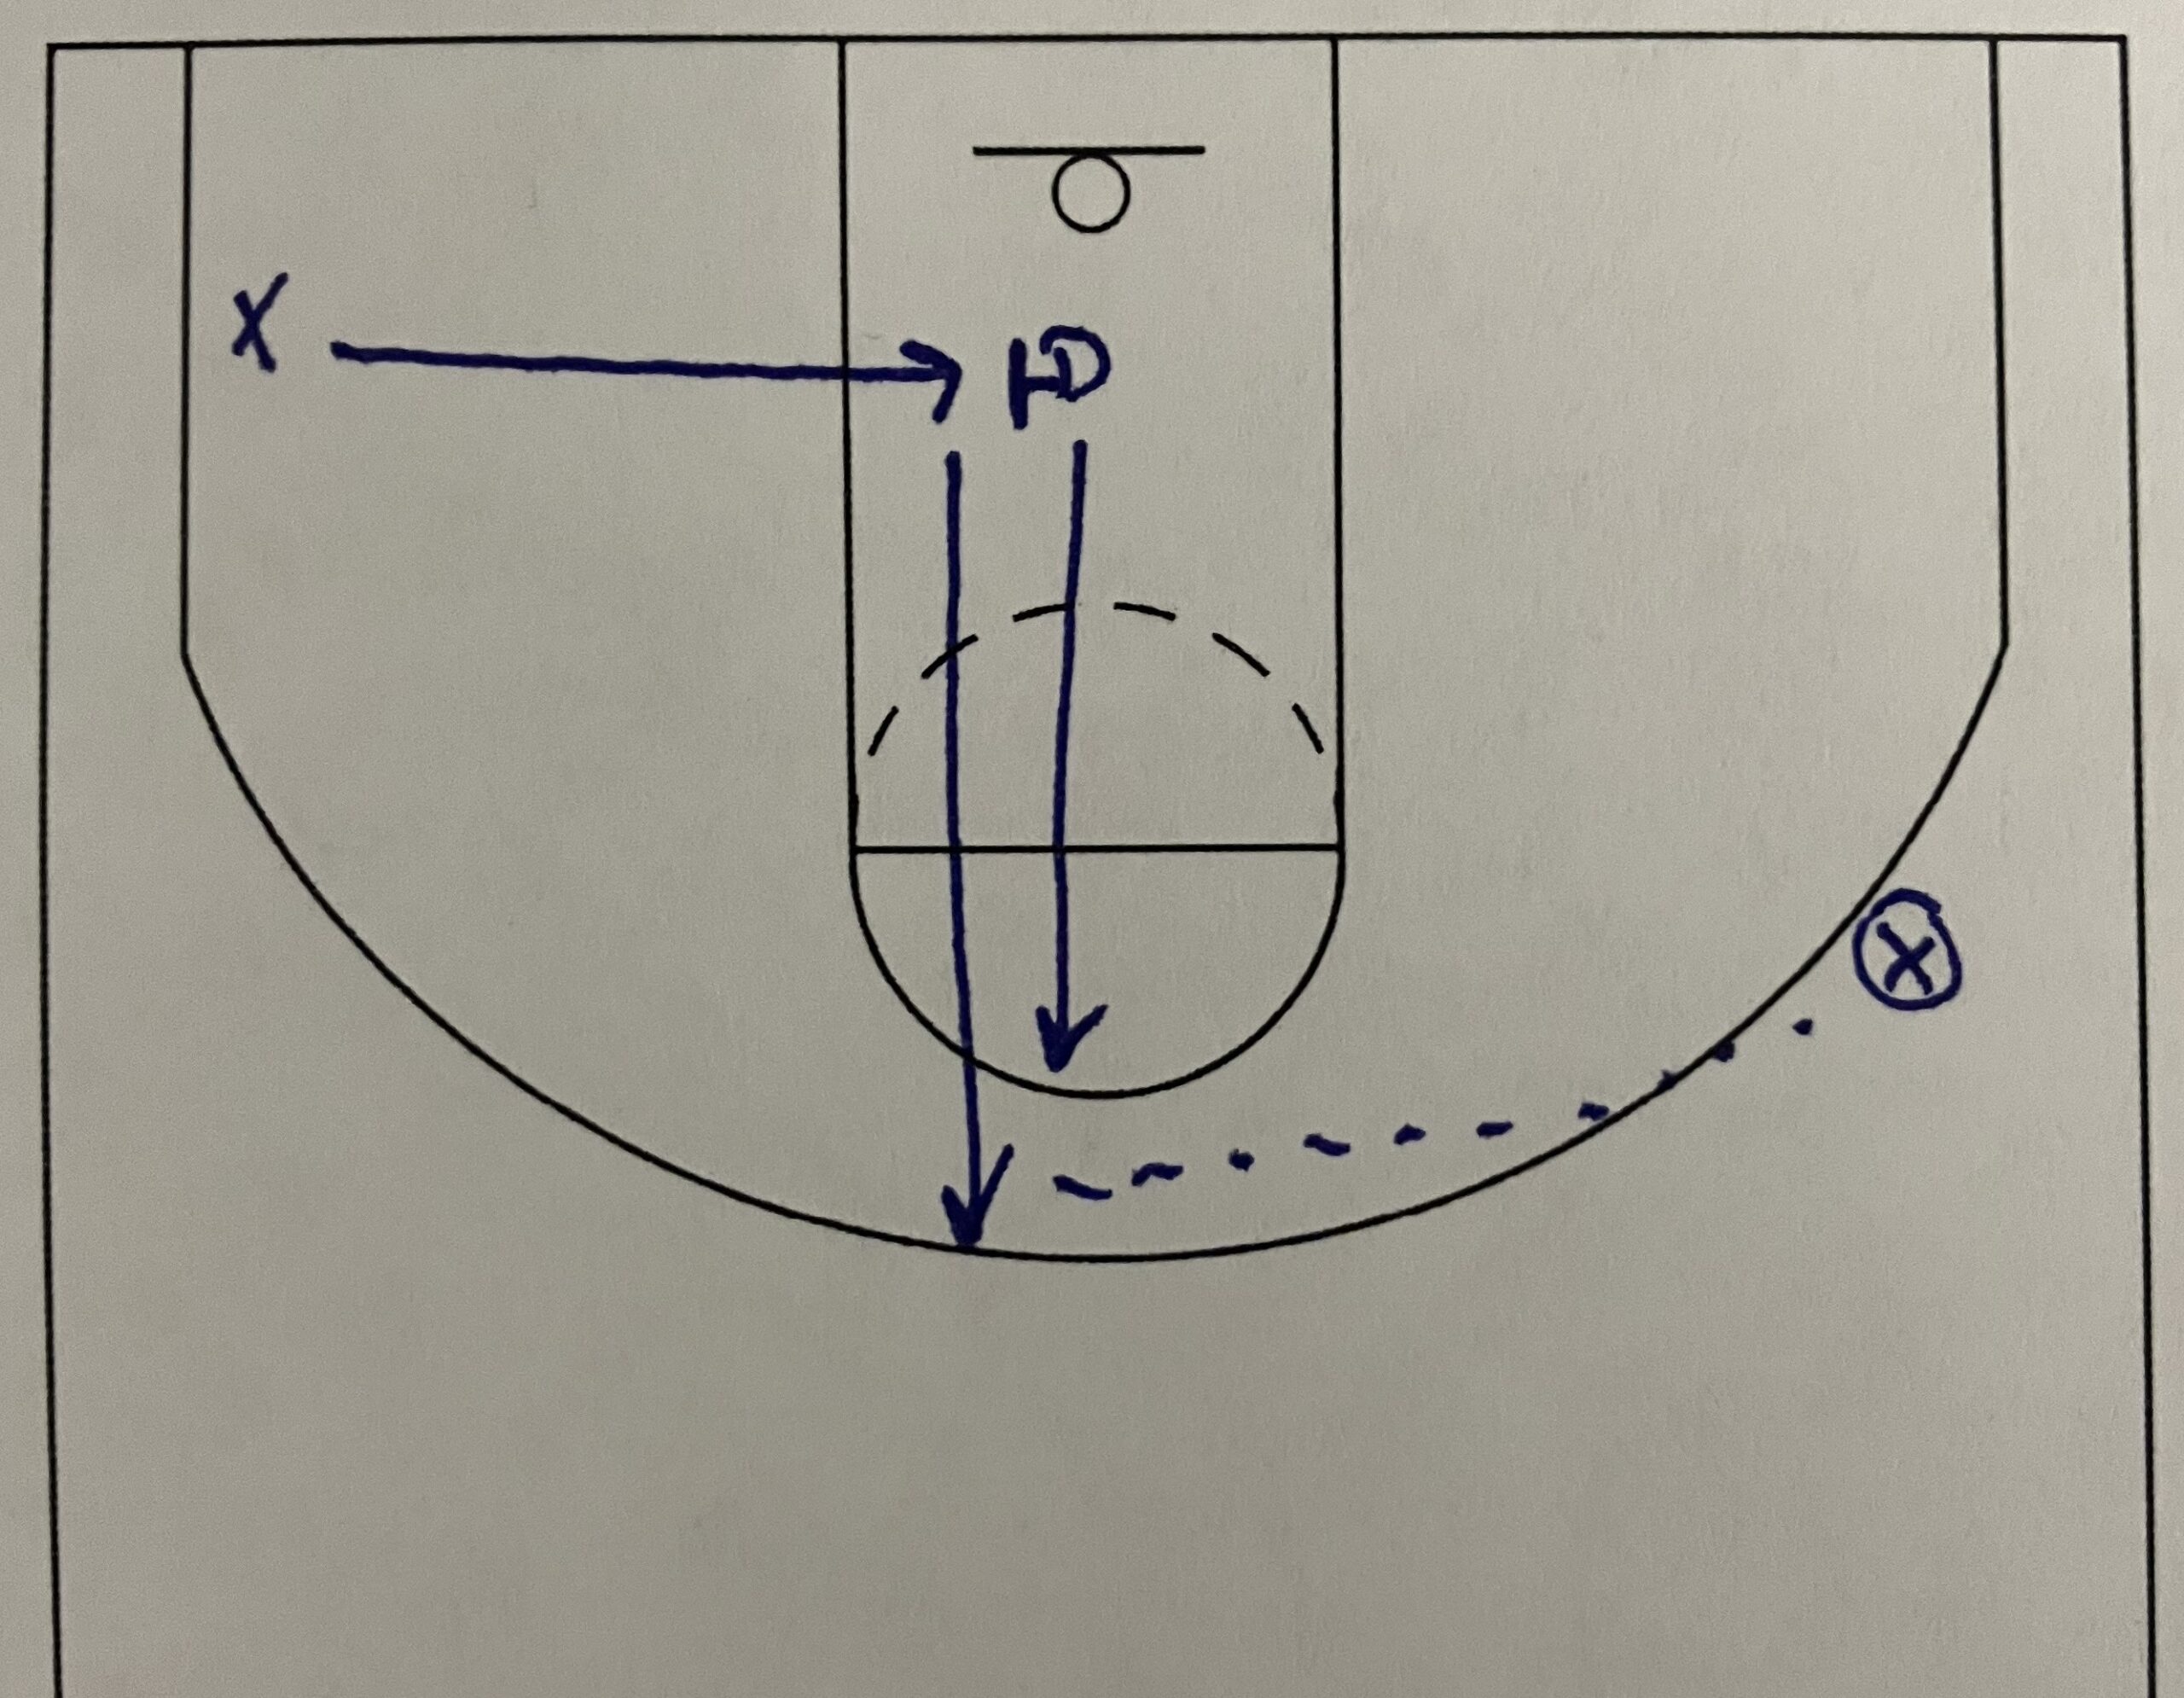
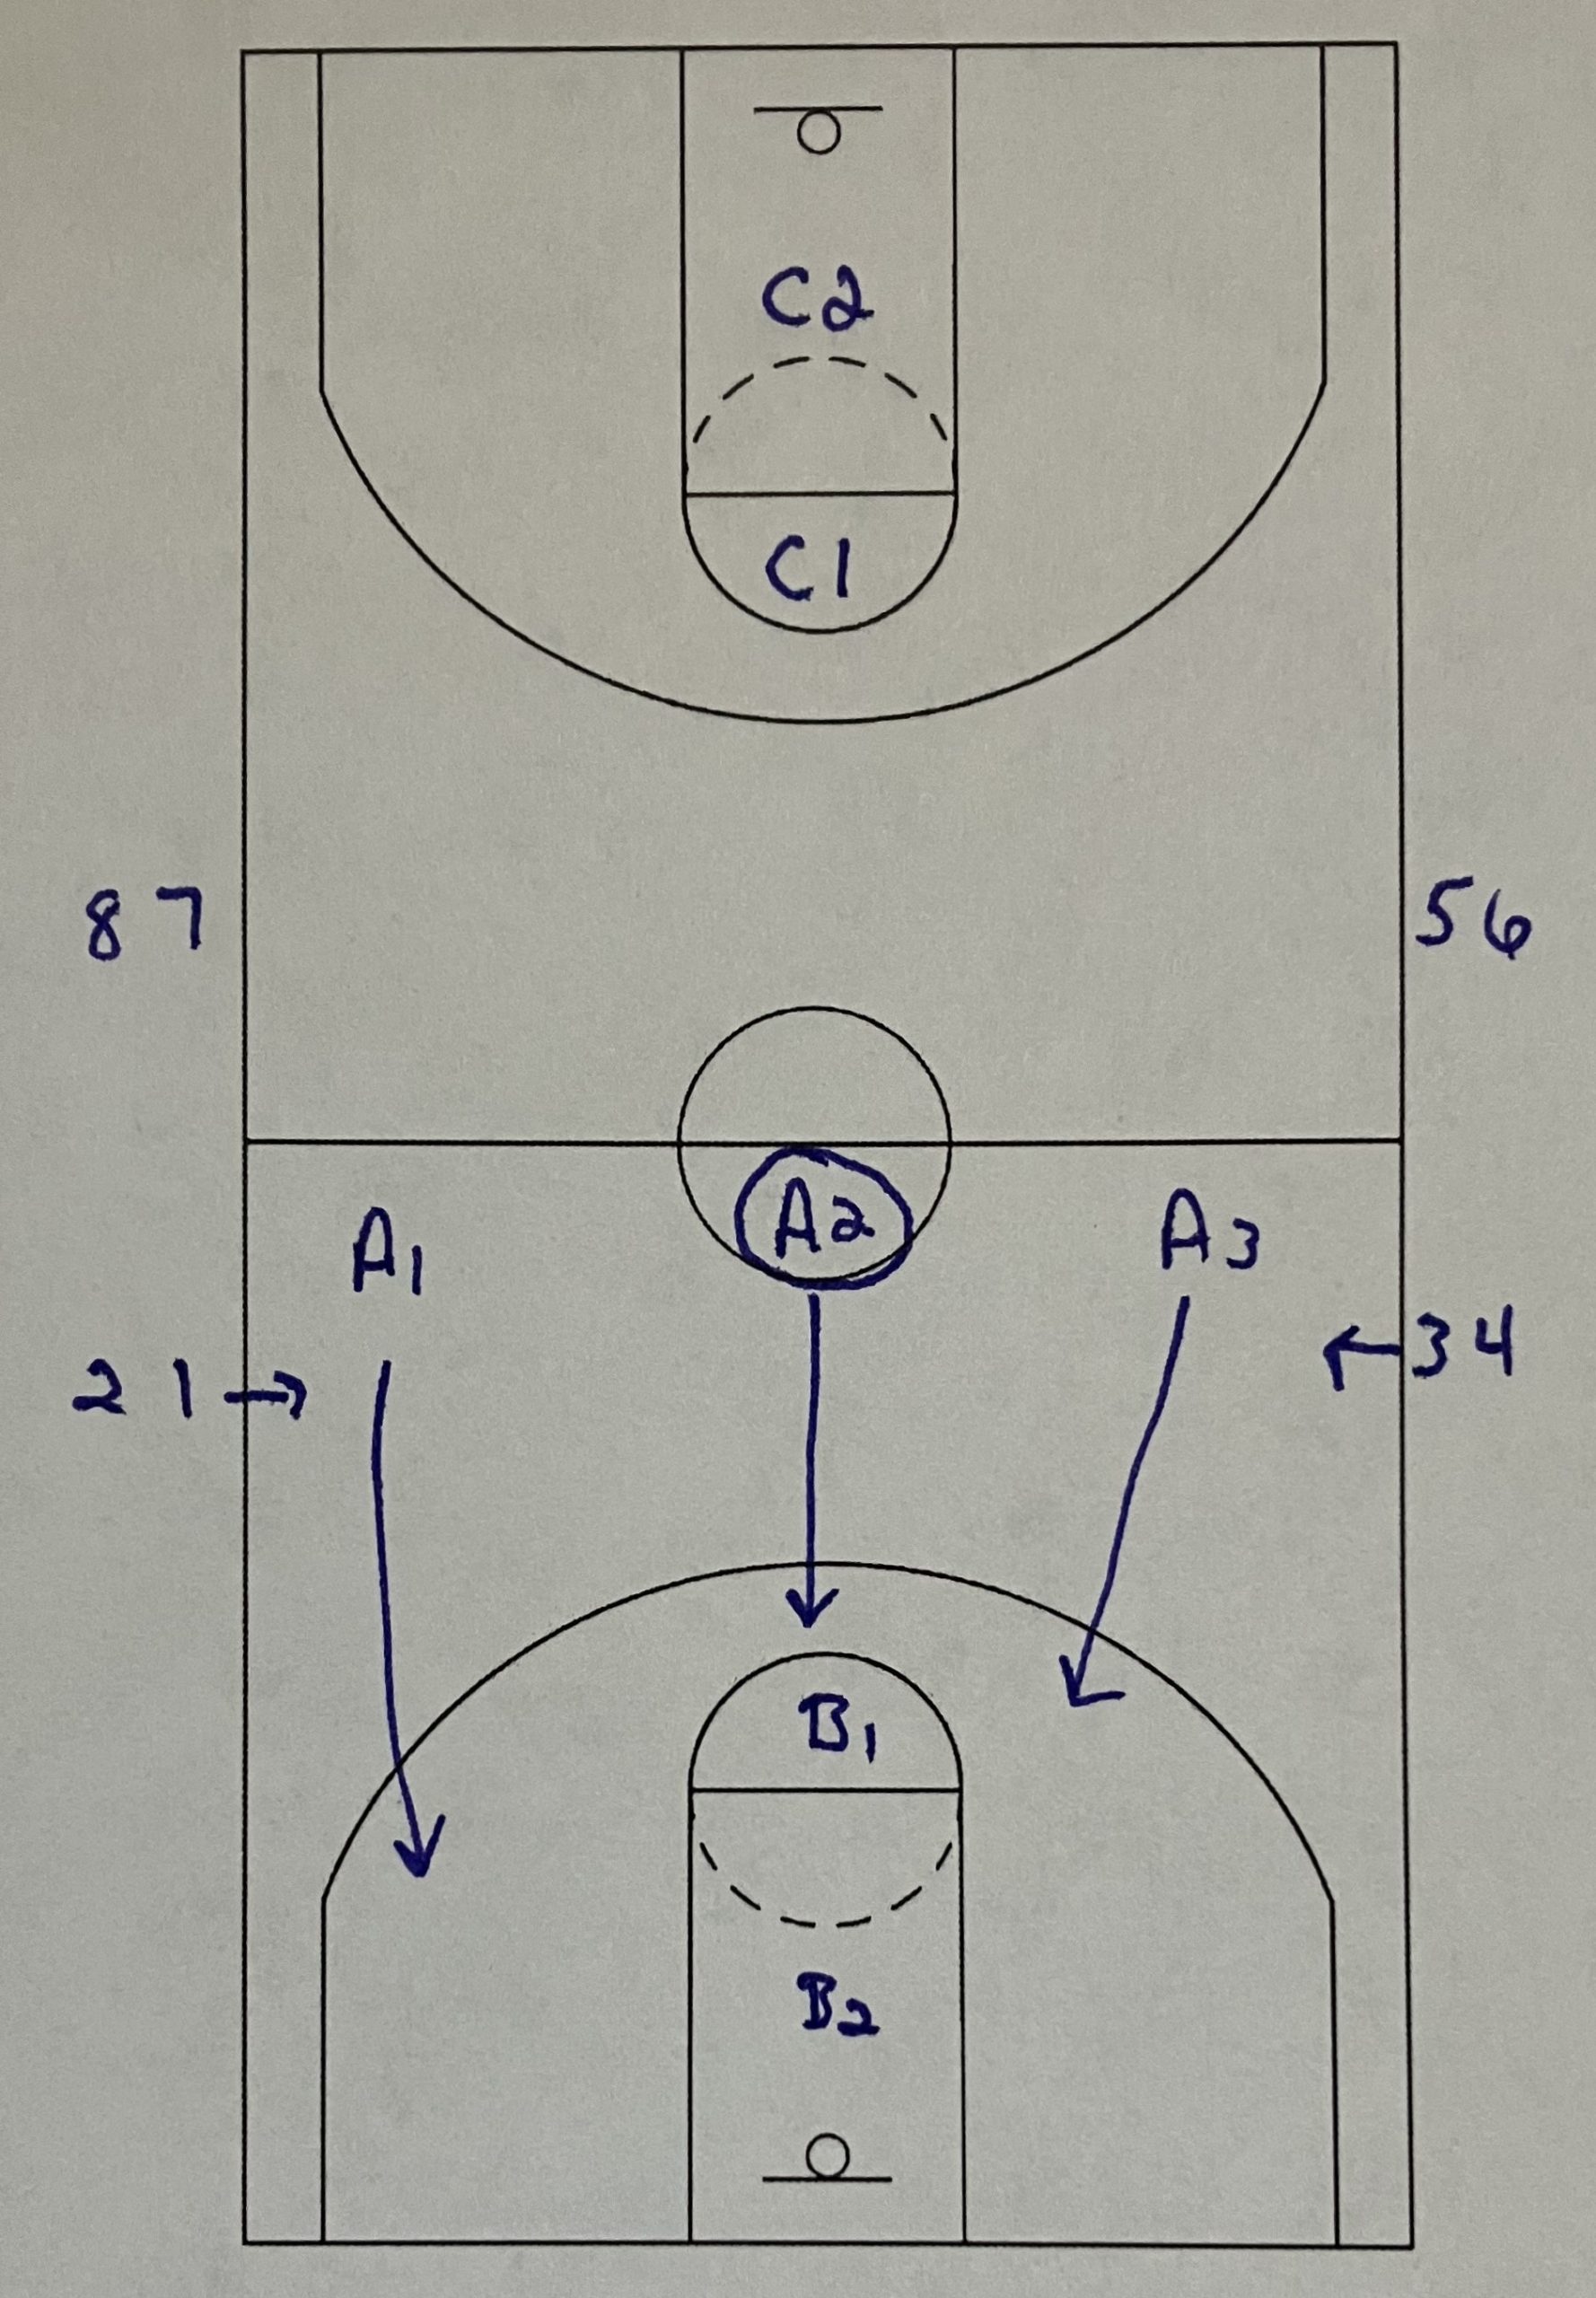
The drill starts as shown below. An offensive player at the top of the key. A defender guarding the ball. And a passer on the wing.
The ball is passed to the wing. The defender “jumps to the ball.” This puts the defender into the correct position so the offensive player cannot cut in front of the defender.
I work on jumping to the ball quite a bit to get the players in the habit of doing it every single pass. The proper defensive placement of players can help prevent a bunch of minor issues. By jumping to the ball, it reduces the chances of the offense of running any kind of give and go for an easy basket.
By jumping to the ball and then adding in the contact of stopping the cut, the offense should struggle with any attempt at scoring with an outside pass followed by a return pass. This prevents give and goes as well as backdoor cuts. The contact makes a backdoor pass much more difficult.
After the defender jumps to the ball, the offensive player is trying to cut to the basket to get open. The defender is stopping the cut and forcing the offensive player to go away from the ball and out to the backside of the offensive play. Depending on how well the defender is able to make contact and stop the cut, the offensive player may leave the paint area anywhere from the foul line down to the basket.
The major coaching point is not letting the offensive player get in between the defender and the ball. The defender must stay in between to prevent any passes from occurring.
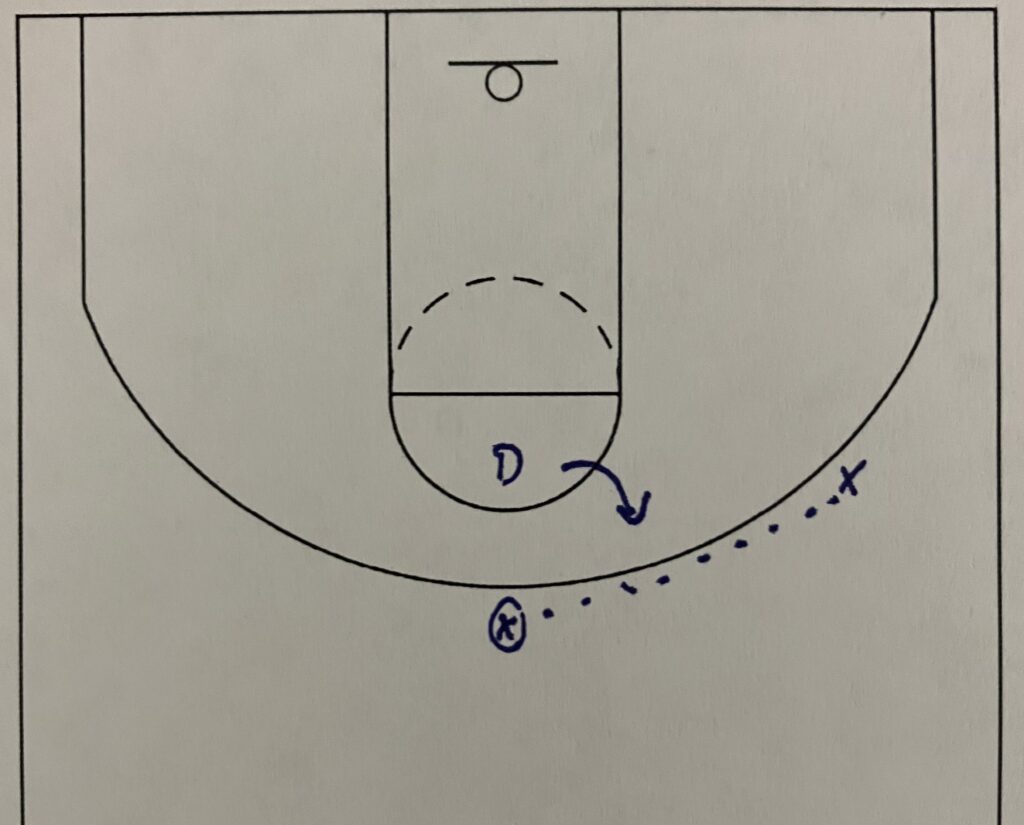
Once the defender is able to maintain correct positioning between the ball and offensive player, the offensive player will move out into the corner.
Separate Drill #1
This is where the main drill can be broken into one of the smaller drills. The adjustment is having the offensive player return back up to the top of the key for a return pass instead of running out to the corner. The offensive player cuts, the defender stops the cut, and the offensive player runs back up to the top. This lets the ball get passed back to the offensive player where the offense and defense can play out the possession. This smaller drill can keep a faster pace in practice if that is what is needed.

The offensive player is now out in the corner with the defender staying in midline help side defense. The offensive player cuts to the basket trying to get around the defender and get a pass somewhere around mid-post to block area. The defender stops the cut as described above and forces the offensive player to move back up the lane away from the basket. Once the offensive player gets above the foul line, the ball can be passed to them to finish the possession trying to score.
The defender being in help side defense so they have to watch the ball to be dribbled because they are the rotating help as well as their man cutting towards the basket. This is helping to develop the eye discipline needed for a player to be a good help side defender.
The defender must see both the ball and their man while in this position. If they are watching just one or the other, then I call it “tunnel vision” and they will not be able to keep their correct positioning throughout the defensive possession.
Separate Drill #2
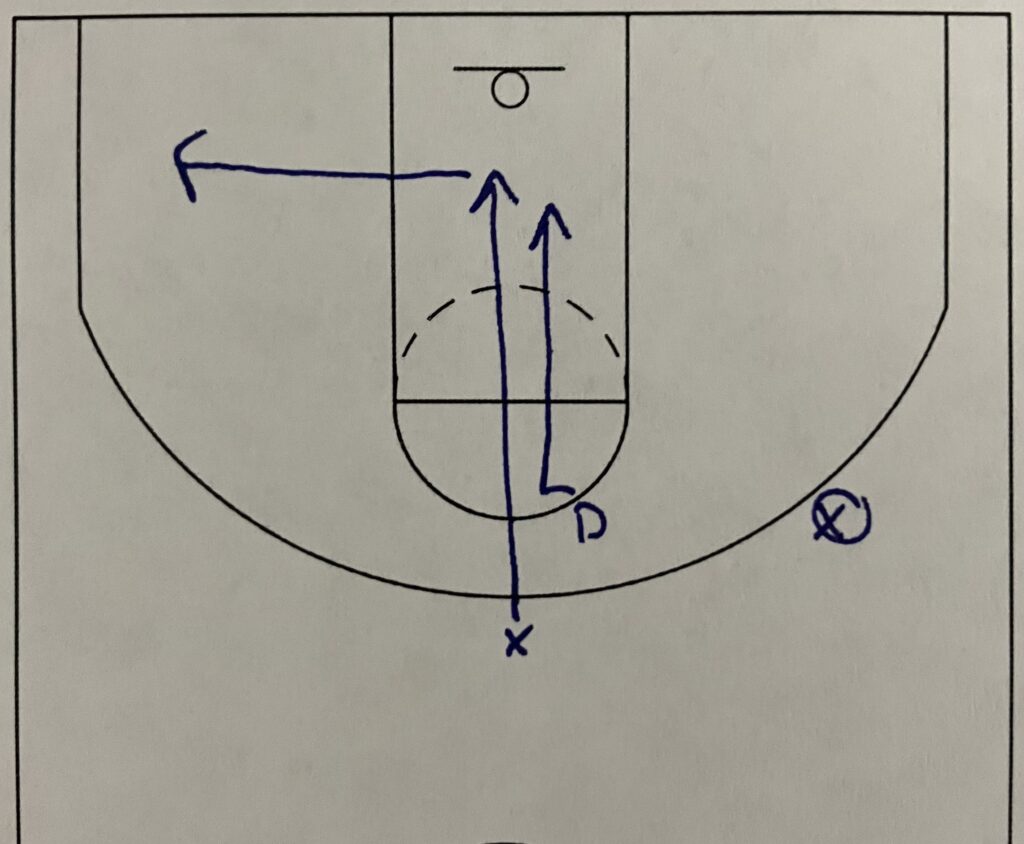
The 2nd side drill that I use from the main drill is starting with the offensive cutting line starting in the corner. The defender starts in the middle of the lane at midline in help side defense. The offensive player cuts and the defender stops the cut and forces the offensive player up the lane. The offensive player gets a pass at the top of the key and plays out the possession.
I like using this separate drill for a couple of different reasons. The first is it can speed up the drill so the players are getting more reps in. The second is for the eye discipline needed to execute the defensive side of the drill effectively.
When breaking the drill down into this separate drill, I add in a couple of additional rules that stresses the defensive player that much more. First, the ball can dribble towards the basket forcing the defender to rotate to stop the ball before returning back to help side defense and stopping the cut. This ensures the defender is seeing both their man and the ball.
The second is throwing a pass every time the defender turns their head and eyes away and off the ball. When the cut is being made, players will have a tendency to turn their head completely away from the ball to focus on the cutter and stopping the cut. When this happens, a pass is made to the cutting usually catching the ball on the opposite block for an easy layup. This reinforces the need for the defender to use their peripheral vision to see both their man and the ball.
Stopping the cut drill whether it is ran using both cuts or separated into just using one cut is a great drill to teach help side man to man defense. A good offensive team stresses the defense with good passing and cutting. A good defensive team stops the cuts and redirects the offensive players off of their initial cut. Stopping cuts is about forcing the offense to do things they do not want to do. These mini battles can have a big impact on which team is going to win each possession.
A good defense forces the offense to shoot as far away from the basket as possible. A defense cannot allow an offense to pass the ball to cutters and put the ball right next to the basket. The defense must stop cuts and deflect or steal any pass attempt looking to get the ball into the interior of the defense.
Stopping cuts and forcing re-directs can be frustrating to the offense because the offense cannot execute like they are suppose too. Stopping cuts is all about the defense forcing the offense to play outside of their normal offensive scheme. Good will teams will adjust but bad teams will struggle. This one little defensive key will help to eliminate the chances of getting upset by a weaker team. It can also disrupt a good team enough and give an underdog defensive team the chance to win a game against a better team. After closeouts, stopping cuts is a foundational piece of any man to man defense.
5 thoughts on “Stop the Cut Drill”