Basketball is a game about scoring more points than the other team. In order to score points, players must shoot and make baskets. The proper shooting form is going to assist players in being able to make their shots. In the following article, I am going to detail the proper shooting form. I am going to start from the feet and go all the way up to the head.
After the initial position, I will detail the body movements during the shot and after the release. While each player is going to naturally alter the proper shooting form to fit into their natural body mechanics, the movement of each player in shooting a basketball should be uniform. This uniformity can help produce muscle memory which should have the desired effect of repeatable motion and made baskets. This is what a player should be doing in shooting a basketball.
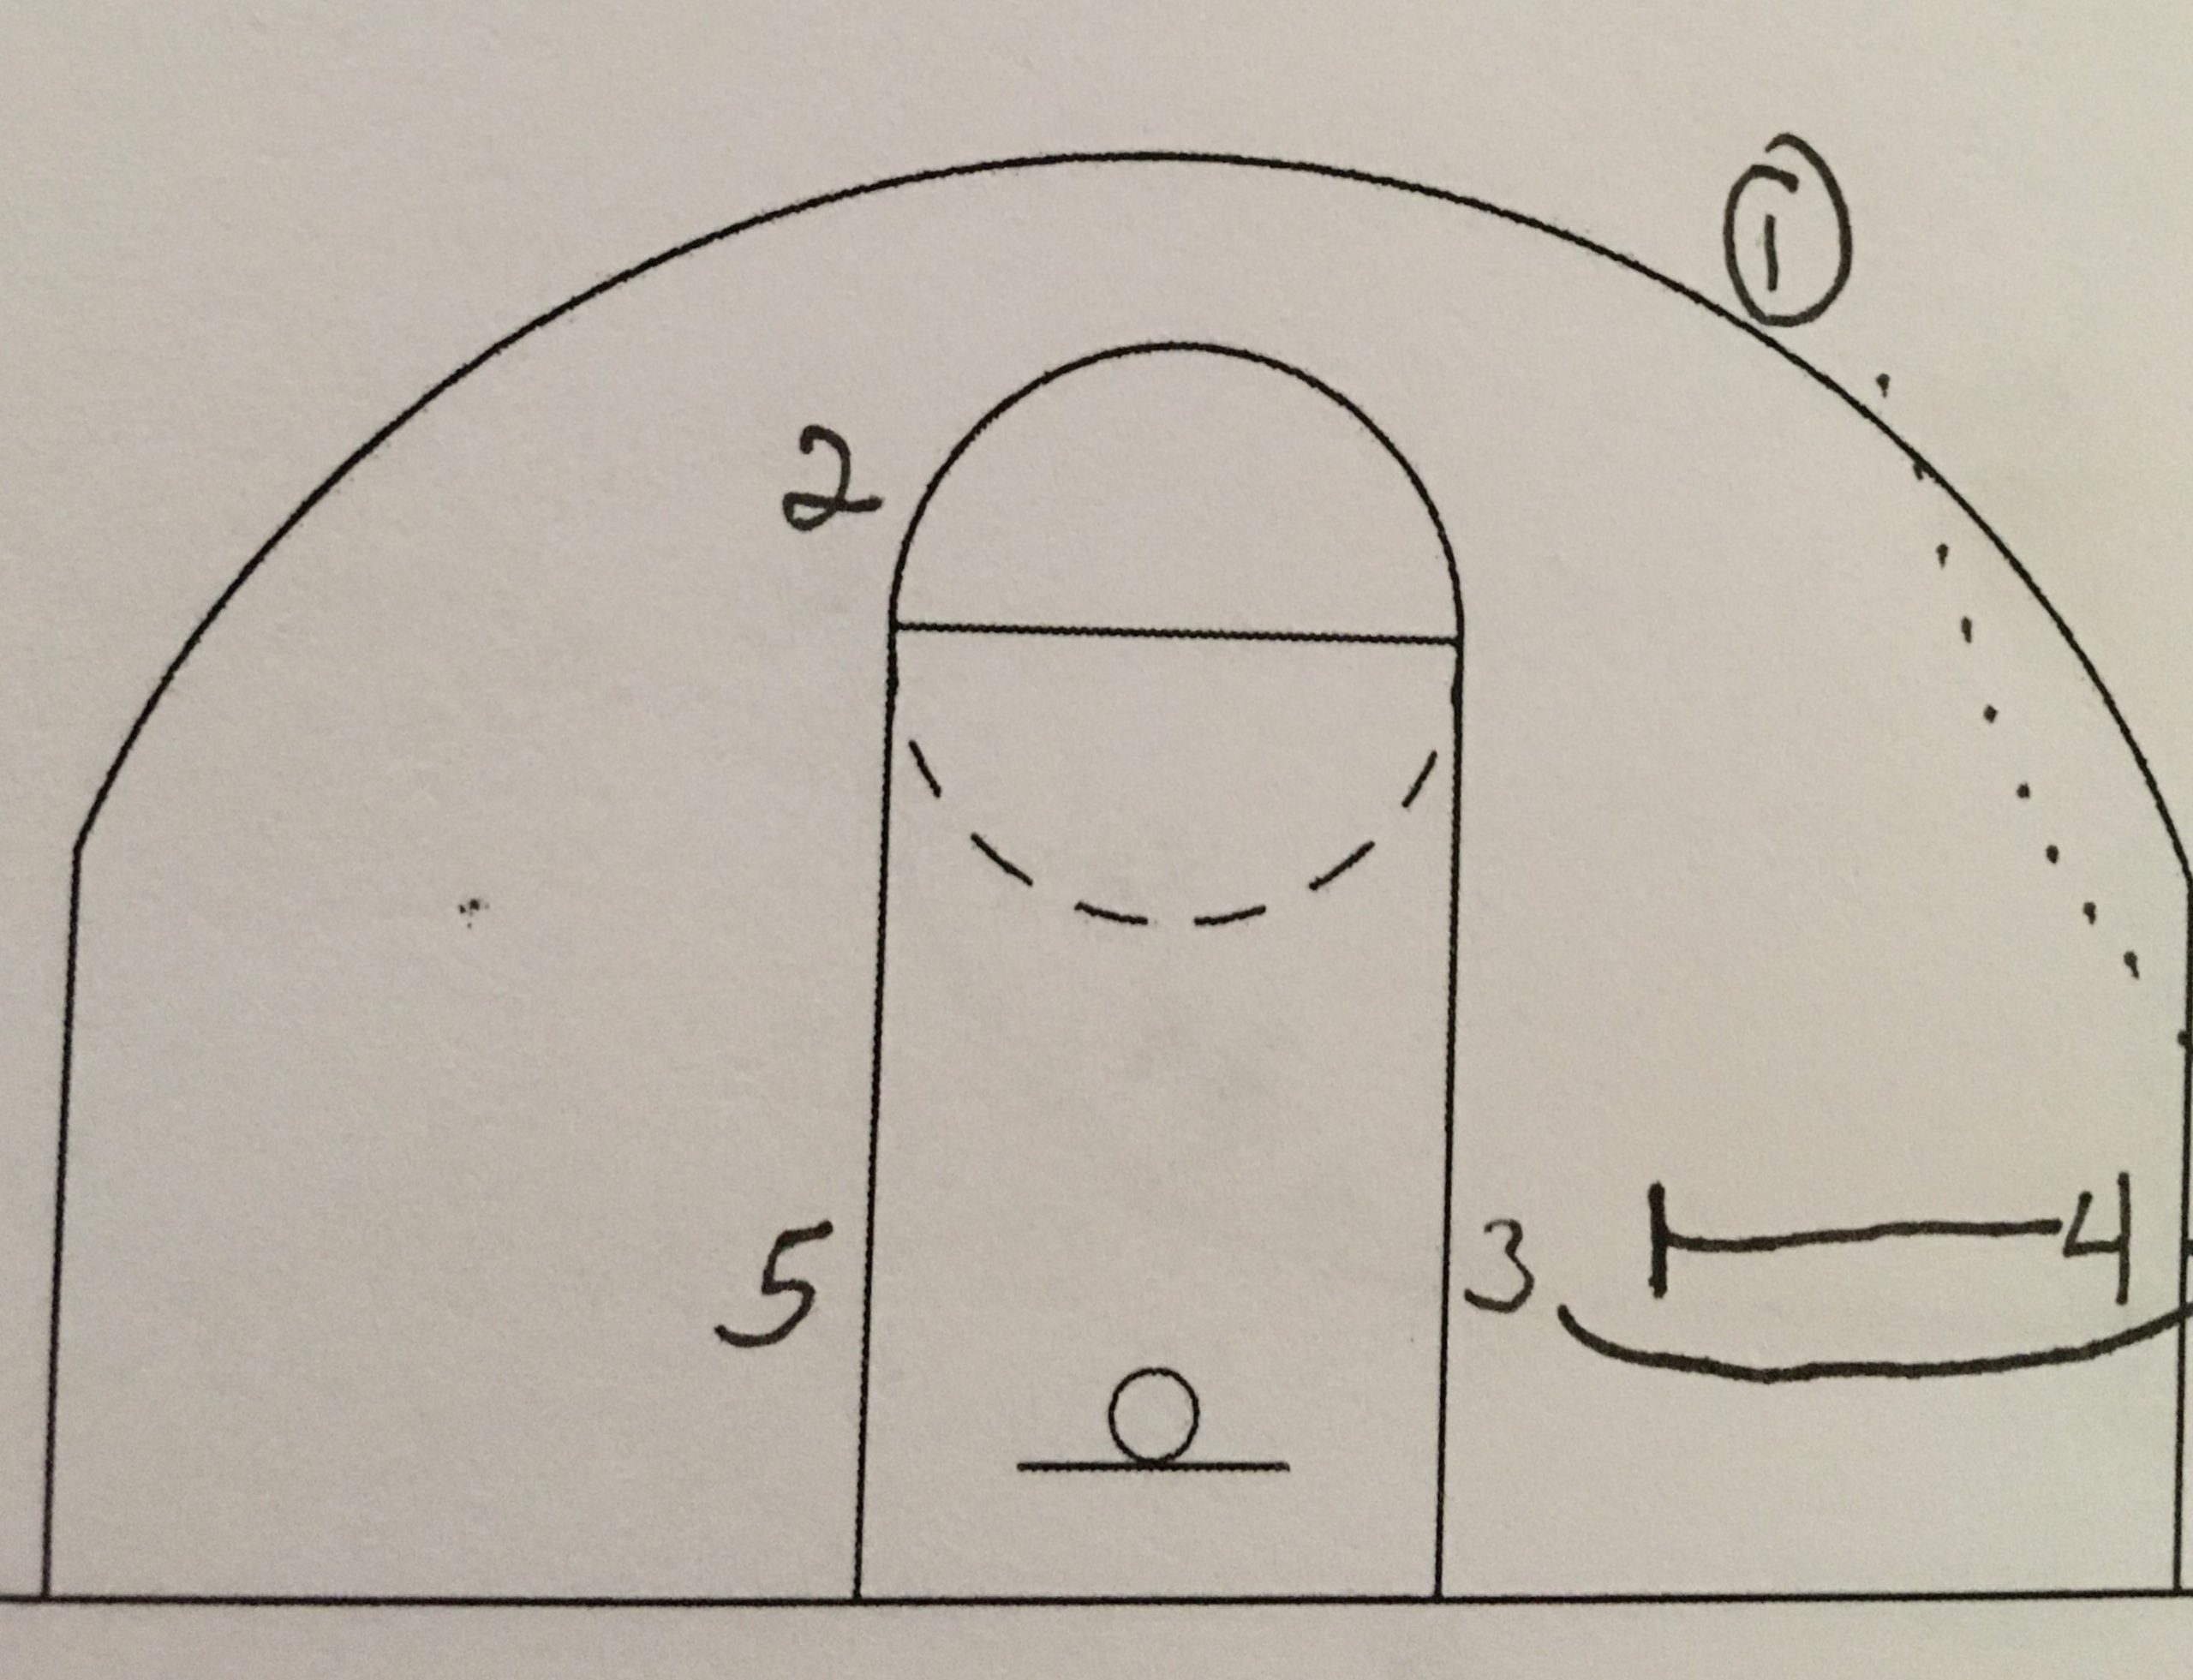
Open vs Closed Stance
A closed stance is what was taught back in the early 2000’s and prior. This is where the body is completely in line with the rim. The shoulders, hips, knees and feet are all facing the basket and are in line with both sides of the rim.
An open stance is what most of the NBA players are using today. The feet, knees, hips and shoulders are all facing just slightly left of the rim for a right handed shooter. The shooting arm is positioned more at the side of the body and not the front of the body. The shooting arm is facing the front of the basket and moves up and towards the basket.
The open stance has come to be preferred by NBA players. I have talked to coaches who prefer both options and there is not a right or wrong choice. But NBA players have time to drill the movements over and over again and shoot thousands of shots each day. They are also going to be much stronger in the legs and body. The NBA players will also have better balance and body control then high school kids on down to grade school.
Because of this I prefer the closed stance in shooting. It is much more simplified and repeatable for the vast majority of kids because of the balance and strength needed in the open stance. The closed stance creates a better foundation with the legs which aids the player in shooting because the legs can become more efficient in producing power into the shot from a closed position rather than an open position. Because of this, I will be detailing the shooting form using the closed shooting form.
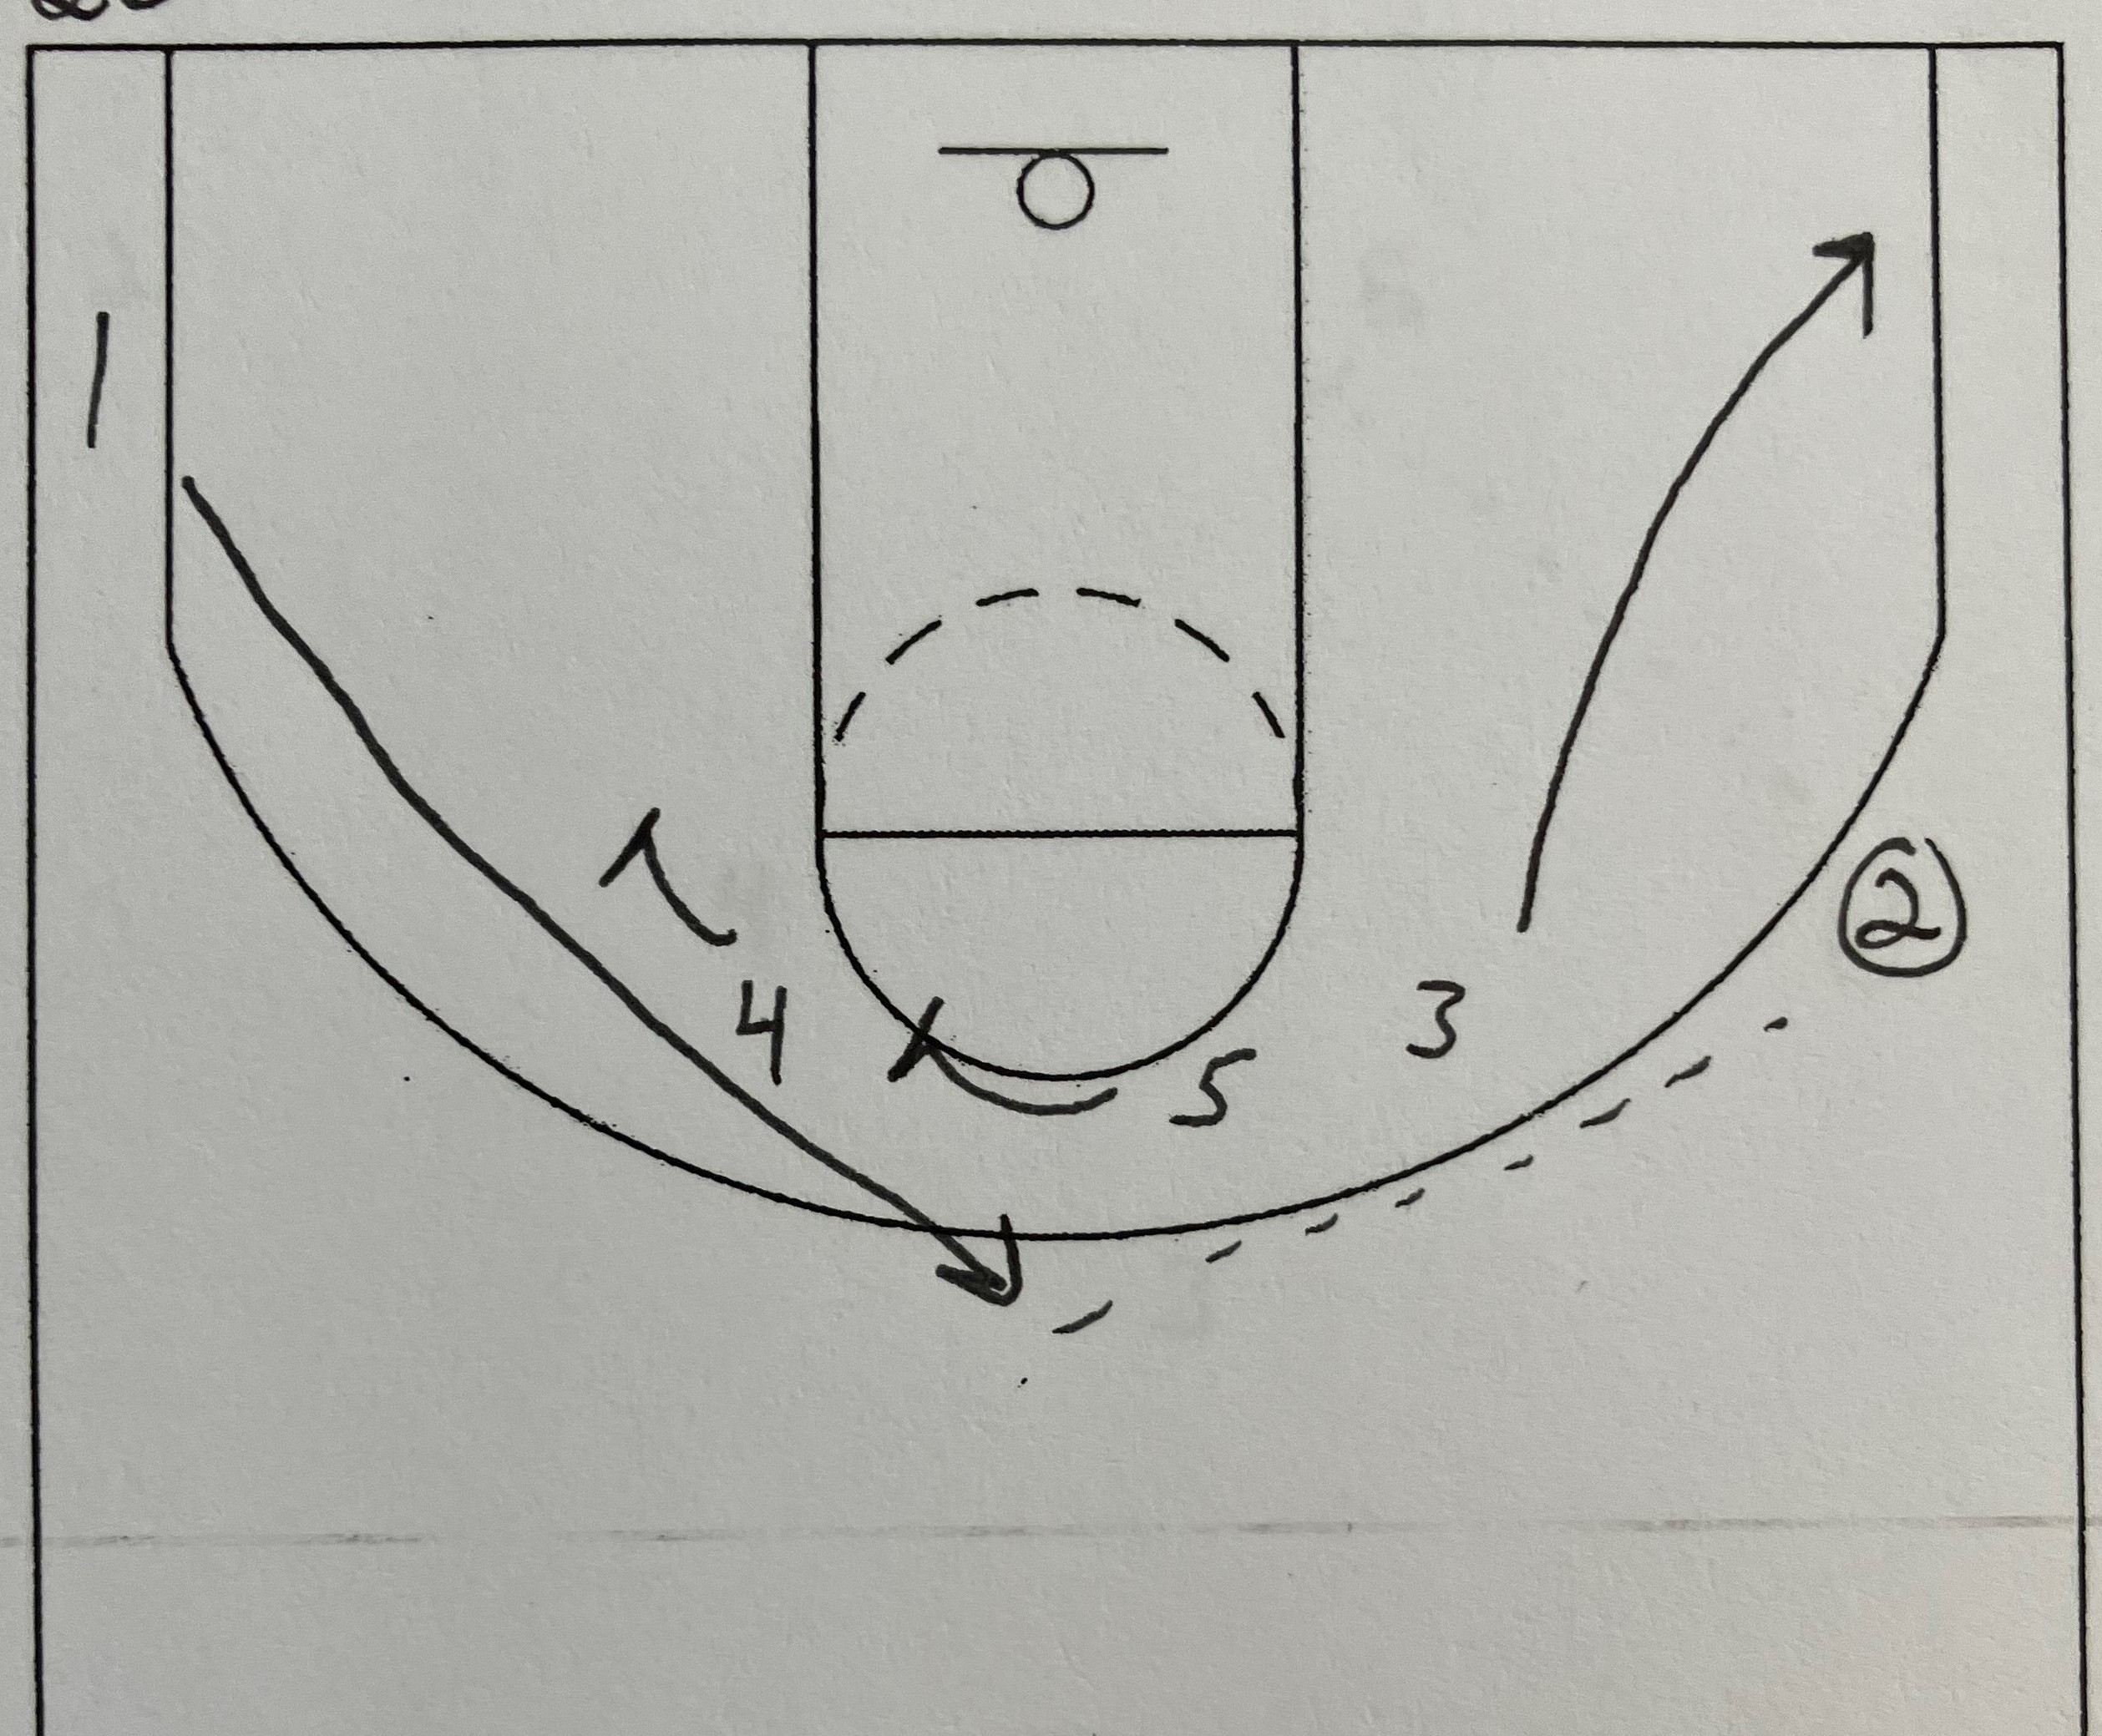
Feet
For a right handed shooter, the left toe should be in line with the in-step of the right foot. This creates the stance having the right foot just slightly in front of the left foot. The feet and therefore the toes should all be facing towards the basket. The feet should be in a good athletic position shoulder width or just wider than should width apart.
Knees
Staying in line with the feet and toes, the knees should be facing in the same direction to the rim. The knees need to be slightly bent in an athletic position. The player should be balanced from the foot and knee placement. The player should not feel like they are leaning or falling in any direction.
Hips
The hips continue the straight line up from the toes, feet and knees. The toes, feet, knees and now hips should have two straight lines from the body straight to the sides of the rim. Everything should be pointing to the basket. The left side of the body should be pointing to the left side of the rim. The right side should be pointing to the right side of the rim.
The hips are the bridge between the legs starting the shot and the arms finishing the shot. If the hips are not in line then the two halves of the body will be working against each other and not together. There should be a slight lean forward at the waist. With the lean, this is the athletic position that is used across the board in almost every sport.
While the position changes for each sport, it is very similar. Tennis players are in this position to receive a serve. Skiers are in this position at the starting gates. Baseball players are here when fielding a ground ball. Linebackers and running backs in football start almost every play from this position. This position is where basketball players need to be in shooting a basketball.
Shoulders
The shoulders help to keep the arms in good positions. They should continue the two lines formed on the lower half of the body to the upper half. The toes, feet, knees, hips and now shoulders should be in a perfect alignment. This alignment helps to keep the shot on a straight line to the basket. If done properly then the shot should not miss left or right. They should only miss short or long. This helps to simplify the shooting form and make it easier to fix when shots are not going in.
Elbow
The elbow should make a 90 degree angle between the upper arm and lower arm. The upper arm (bicep and triceps) should be parallel to the ground. The point of the elbow should be pointing in the direction of the rim.
Wrist
The wrist should form a 2nd 90 degree angle. If the wrist cannot flex back to 90 degrees then it should be as close to 90 degrees as possible. The wrist should be relaxed with the ball sitting in the hand. The upper arm being parallel to the ground will put the ball right at or just above the eye level. Due to strength or comfort, some players will lower this arm position down. The lowering of the arm gives the body more ability to produce power by using more of the arm muscles in the shot. At the initial eye level, the triceps, foreman and wrist are the only things producing the power needed to shoot the ball. By lowering the arm level, the shoulder and maybe the chest and back muscles can be used to increase the power of the shot.
Hand
The hand should be relaxed. The ball should sit on the pads of the hand and fingers. The ball should never touch the palm of the hand. The index finger should be almost touching the eyebrow. The sightline to the basket should be right under the thumb. The arm should position the ball high enough to have a clear view directly from the eyes, from just under the thumb on the ball and to the basket. Again if the comfort or strength is not adequate for the player then the arm and ball is going to be lower. You will see this a lot at the lower grade levels. As the players get bigger and stronger then the arm and ball should continue to rise up to this level.
Off-Hand
The left hand for a right handed shooter is the off-hand. It should be flat on the side of the ball. The off-hand is used only for maintaining the ball in the shooting hand. Once the shooting hand starts the shot then the off-hand is no longer used. The off-hand will stay close to the body as the shooting arm moves up and away from the body. While not used in the shot, the off-hand has two of the biggest universal problems with shooting.
1) The off-hand is positioned on the front of the ball and not the side. This causes the player to push through the non-shooting hand to release the ball and creates inconsistency in shooting performance. This push will cause the ball to move either to the left or the right of the rim.
2) The thumb and wrist of the off-hand starts to aid in adding power to the shot by turning with the ball as it is released. This will create side spin and push the ball off of the shooting line. This will cause misses right and left. The off-hand has to stay still as the shooting hand starts the shot.
Head/Eyes
The head and eyes should not move during the entire shot. The head should be straight up and down. Do not lean the head to create a sightline. If you cannot see the basket then the ball needs to move up or down with the arm and hand. If the shot is coming from a dribble or spin move then the eyes should locate the rim as soon as possible. The focus should be on the front of the rim. The player should be trying to shoot the ball just over that spot. The eyes should try and focus on as small of a spot as possible. This hyper focus on a small spot and shooting just over that spot should help to eliminate different shooting backgrounds with the different gyms players will be playing in.
Starting the Shot
The feet, legs and knees start the shot by bending and lowering towards the ground. This helps to power the shot. Then the legs, knees and feet push off the ground to produce a jump. As the legs lower, the arms and ball will naturally lower in unison with the legs. As the legs start the jump, the arms and ball should come back to the correct shooting pocket. As the ball reaches the shooting pocket, the legs and feet should start to come off the ground on the jump. This down/up motion puts the body in sync so no motion or power is wasted.
Release
The arm should start to unload out of the shooting pocket. The arm should straighten to the release point. The arm at the release point should have the elbow of the shooting arm in a straight line with the top of the eyebrow. If the elbow is any higher than the ball, then the shot will be a very high arching shot. If the elbow is lower than the eyebrow, then the shot is flat and will not be made at as high of a percentage. As the arm gets to a straightened position, the wrist should release into a half circle motion. I have heard a couple of different sayings for how the wrist and hand should look like at the end of the release.
1) The palm should be facing straight down towards the floor.
2) The hand should look like a little kid trying to reach into a jar to get a cookie when they are just not quite tall enough to reach.
Either way the hand, fingers, and wrist should have turned completely over. The ball should release out of the hand at the highest point in the jump. It should not leave the hand as the body is going up or back down from the jump. And finally the tip of the index finger should have the last bit of contact with the ball as the ball is being released.
Follow Through and Finish
The fingers should turn over and point flat or down to the ground. This finger placement is more about the comfort of the shooter. The jump should have the feet leave the ground at the same time and land back on the ground at the same time. The shooter should not land with one foot hitting the ground before the other. The feet should still be in the same position as the initial start of the shot. The right foot should still be just in front of the left foot.
The landing from the jump should either be in the same spot as the takeoff or to a max of 6 inches in front of the takeoff spot. Most shooters will travel a little bit forward in their shooting. Finally the arm should stay in the release straightened position until landing. Shooters should not drop their shooting arm until they have landed.
This will help to prevent a short arming shot motion which can cause shots to be very hard to control. A short-armed shot is not a smooth motion because the shooting arm is returning to the shooting pocket quickly which puts a lot of unwanted force on the ball. You want the motion of the shot to be nice and relaxed and smooth.
Conclusion
I have detailed the proper shooting form needed to shoot a basketball. I have heard a lot of people comment on how some player shoots 1,000 or 2,000 shots every day. But if those shots are not done in good form then they are hard to replicate in a game setting. I would rather a player shoot 500 perfect formed shots every day then shoot 5,000 bad and inconsistent form shots. The ability to be consistent in making shots is what makes a player a good shooter. Anybody can shoot the ball. Good shooters are the players who make their shots. Good shooting form helps to aids players in becoming consistent in their shooting.
13 thoughts on “Proper Basketball Shooting Form”