
One of the least utilize skills in my opinion is back dribbling out of trouble. The easiest way for a player to get rid of defensive pressure is to take a hard back dribble or two to create space before deciding what to do next. Players do not know how and where to properly to use a back dribble so drills can be used to create game situations for players to learn when and how to use the dribble.
The first place to use a back dribble is during a press when a defense is trapping the ball. An offensive player can make one or two hard back dribbles to get out of the trap before making a pass to go through or around the trap. This drill is simulating a defensive trap and how the offensive player should react to finding themselves in a trap.
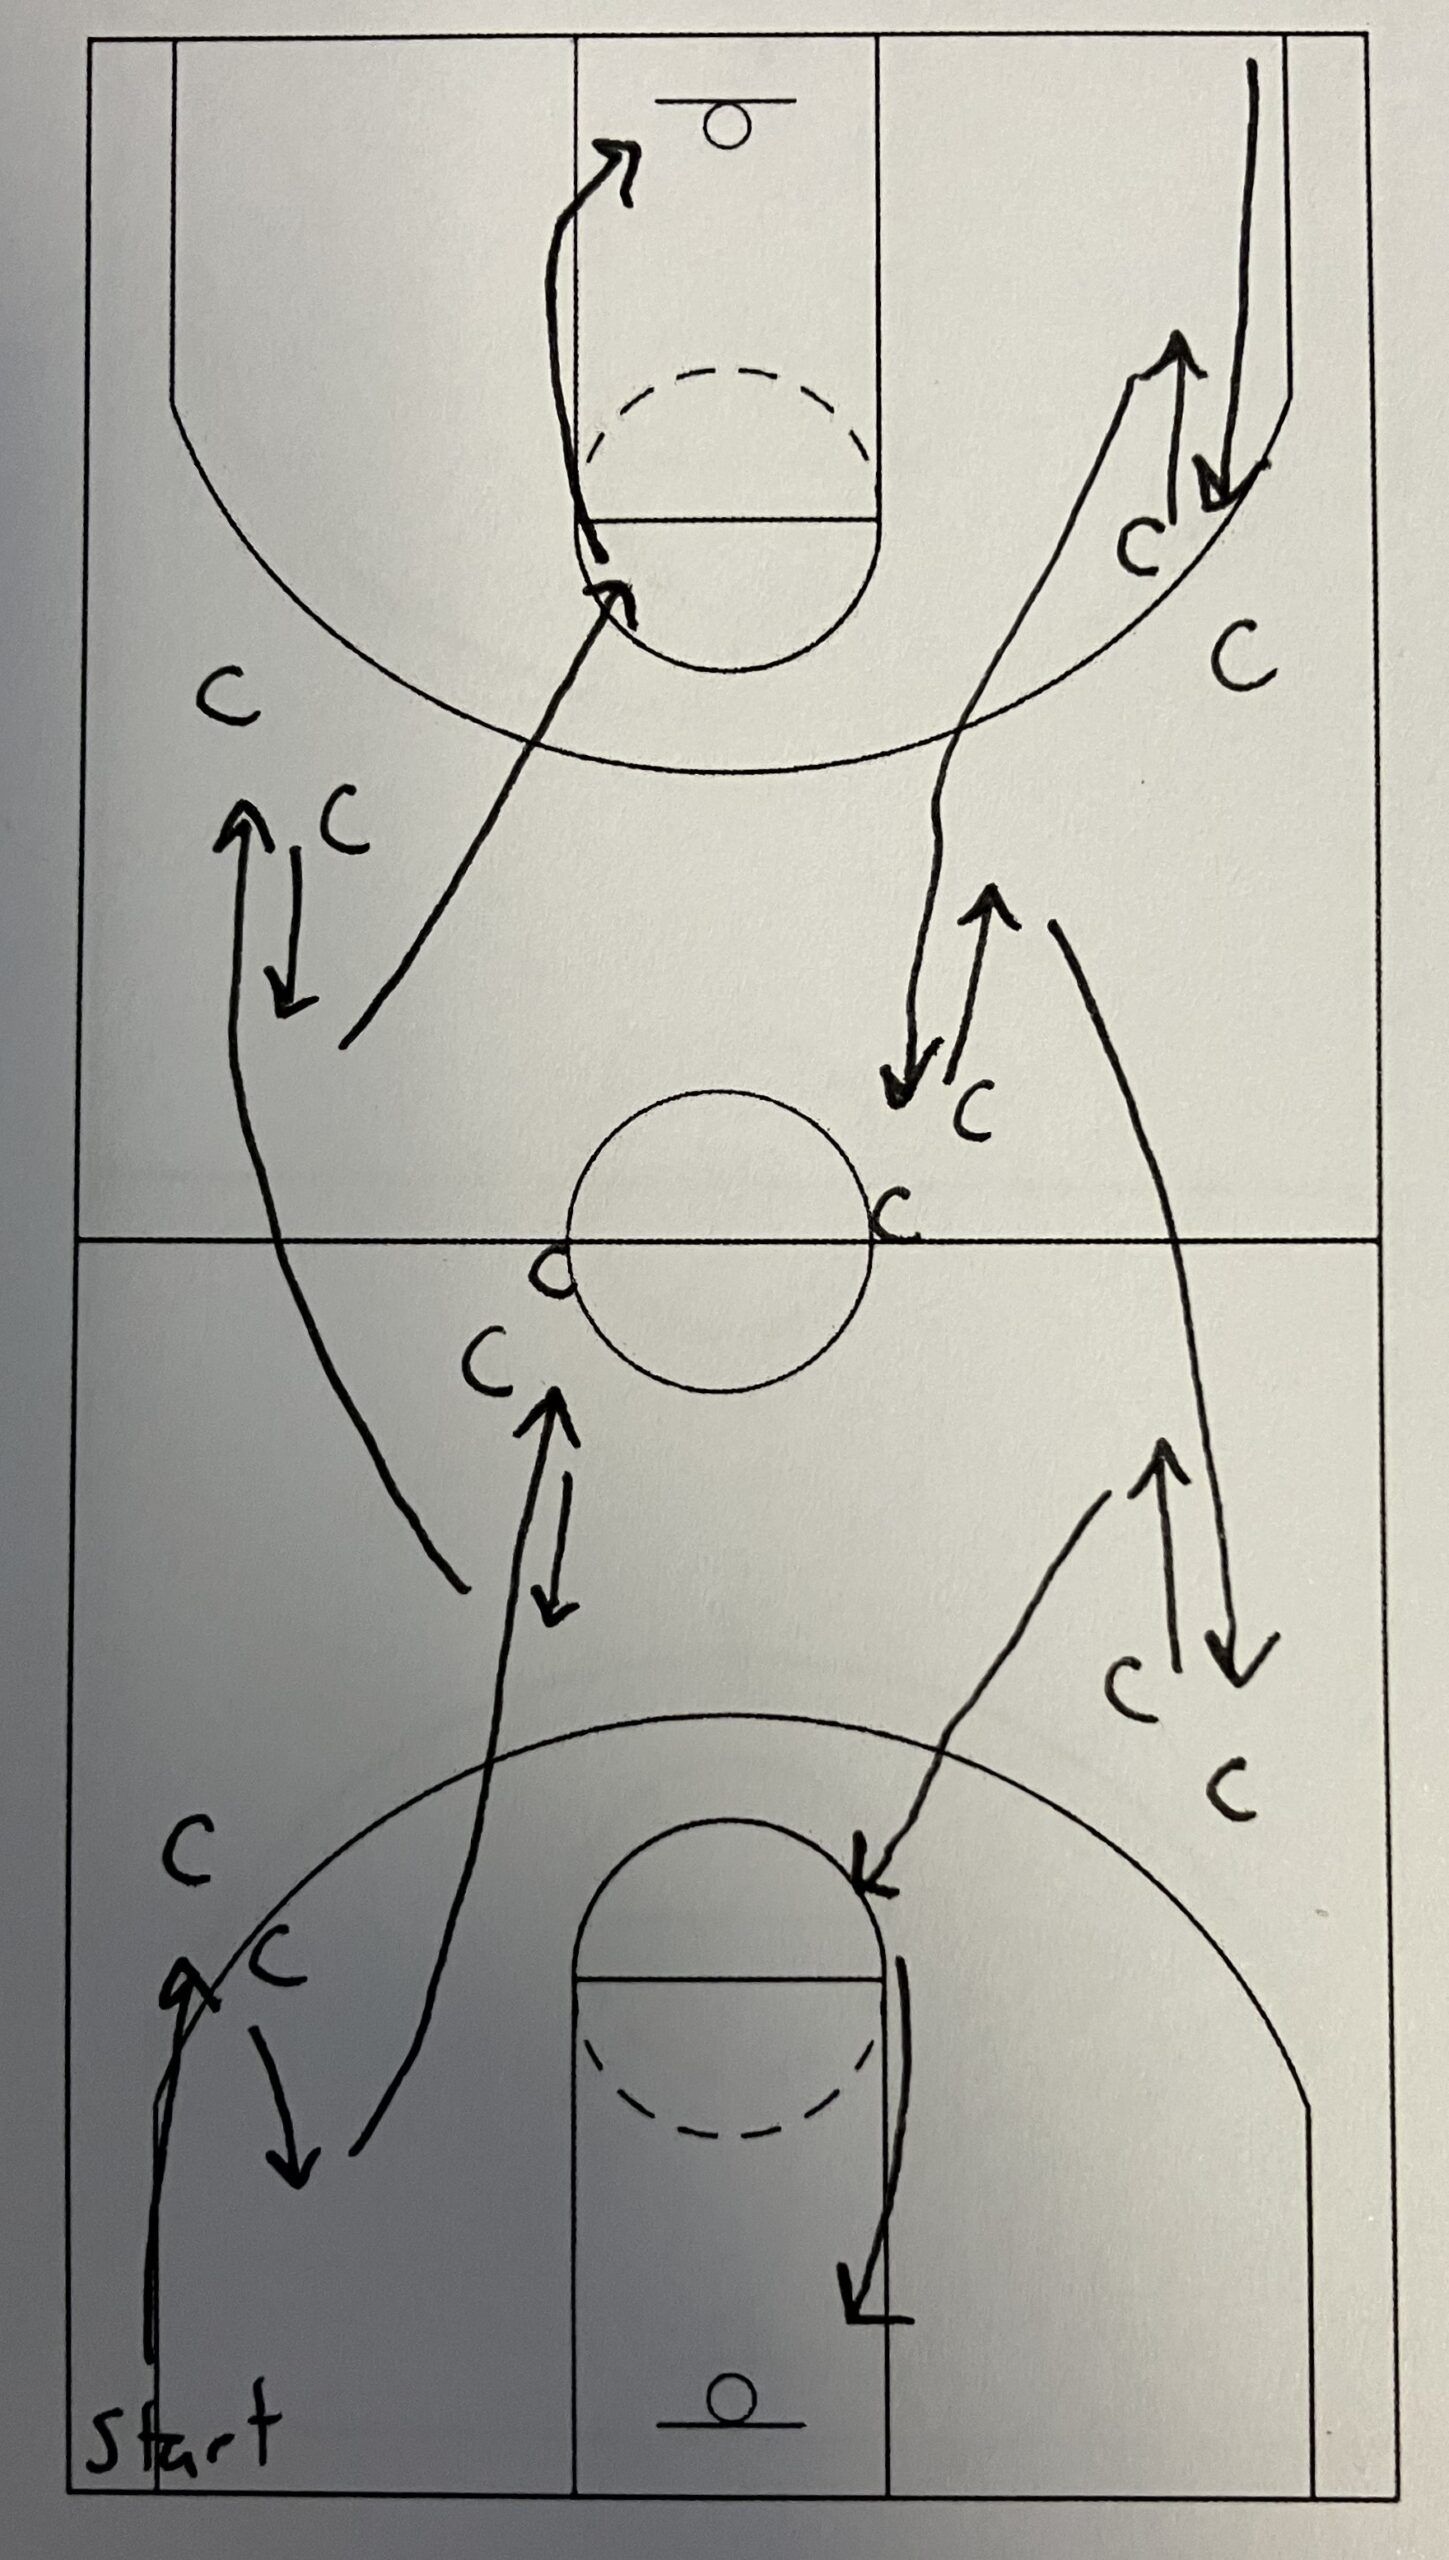
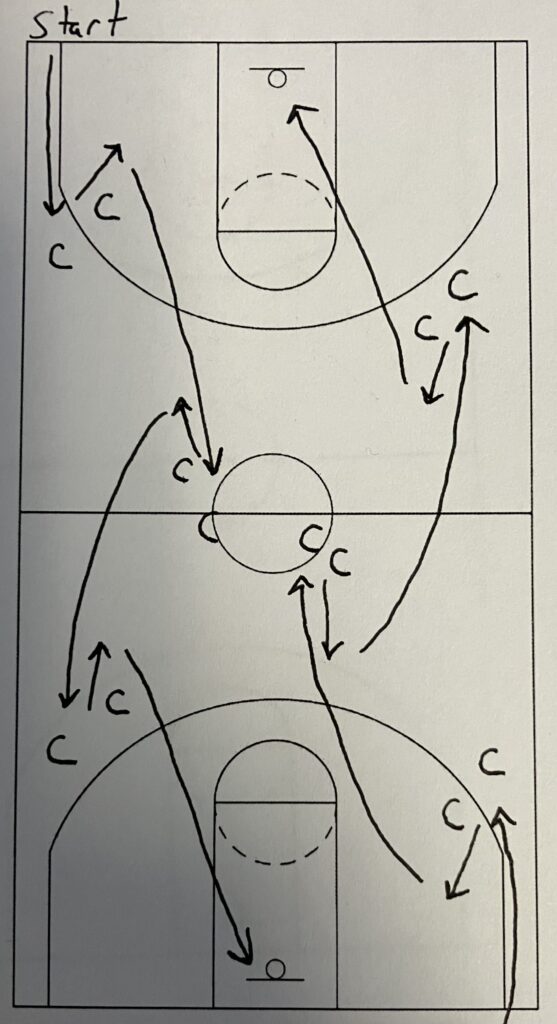
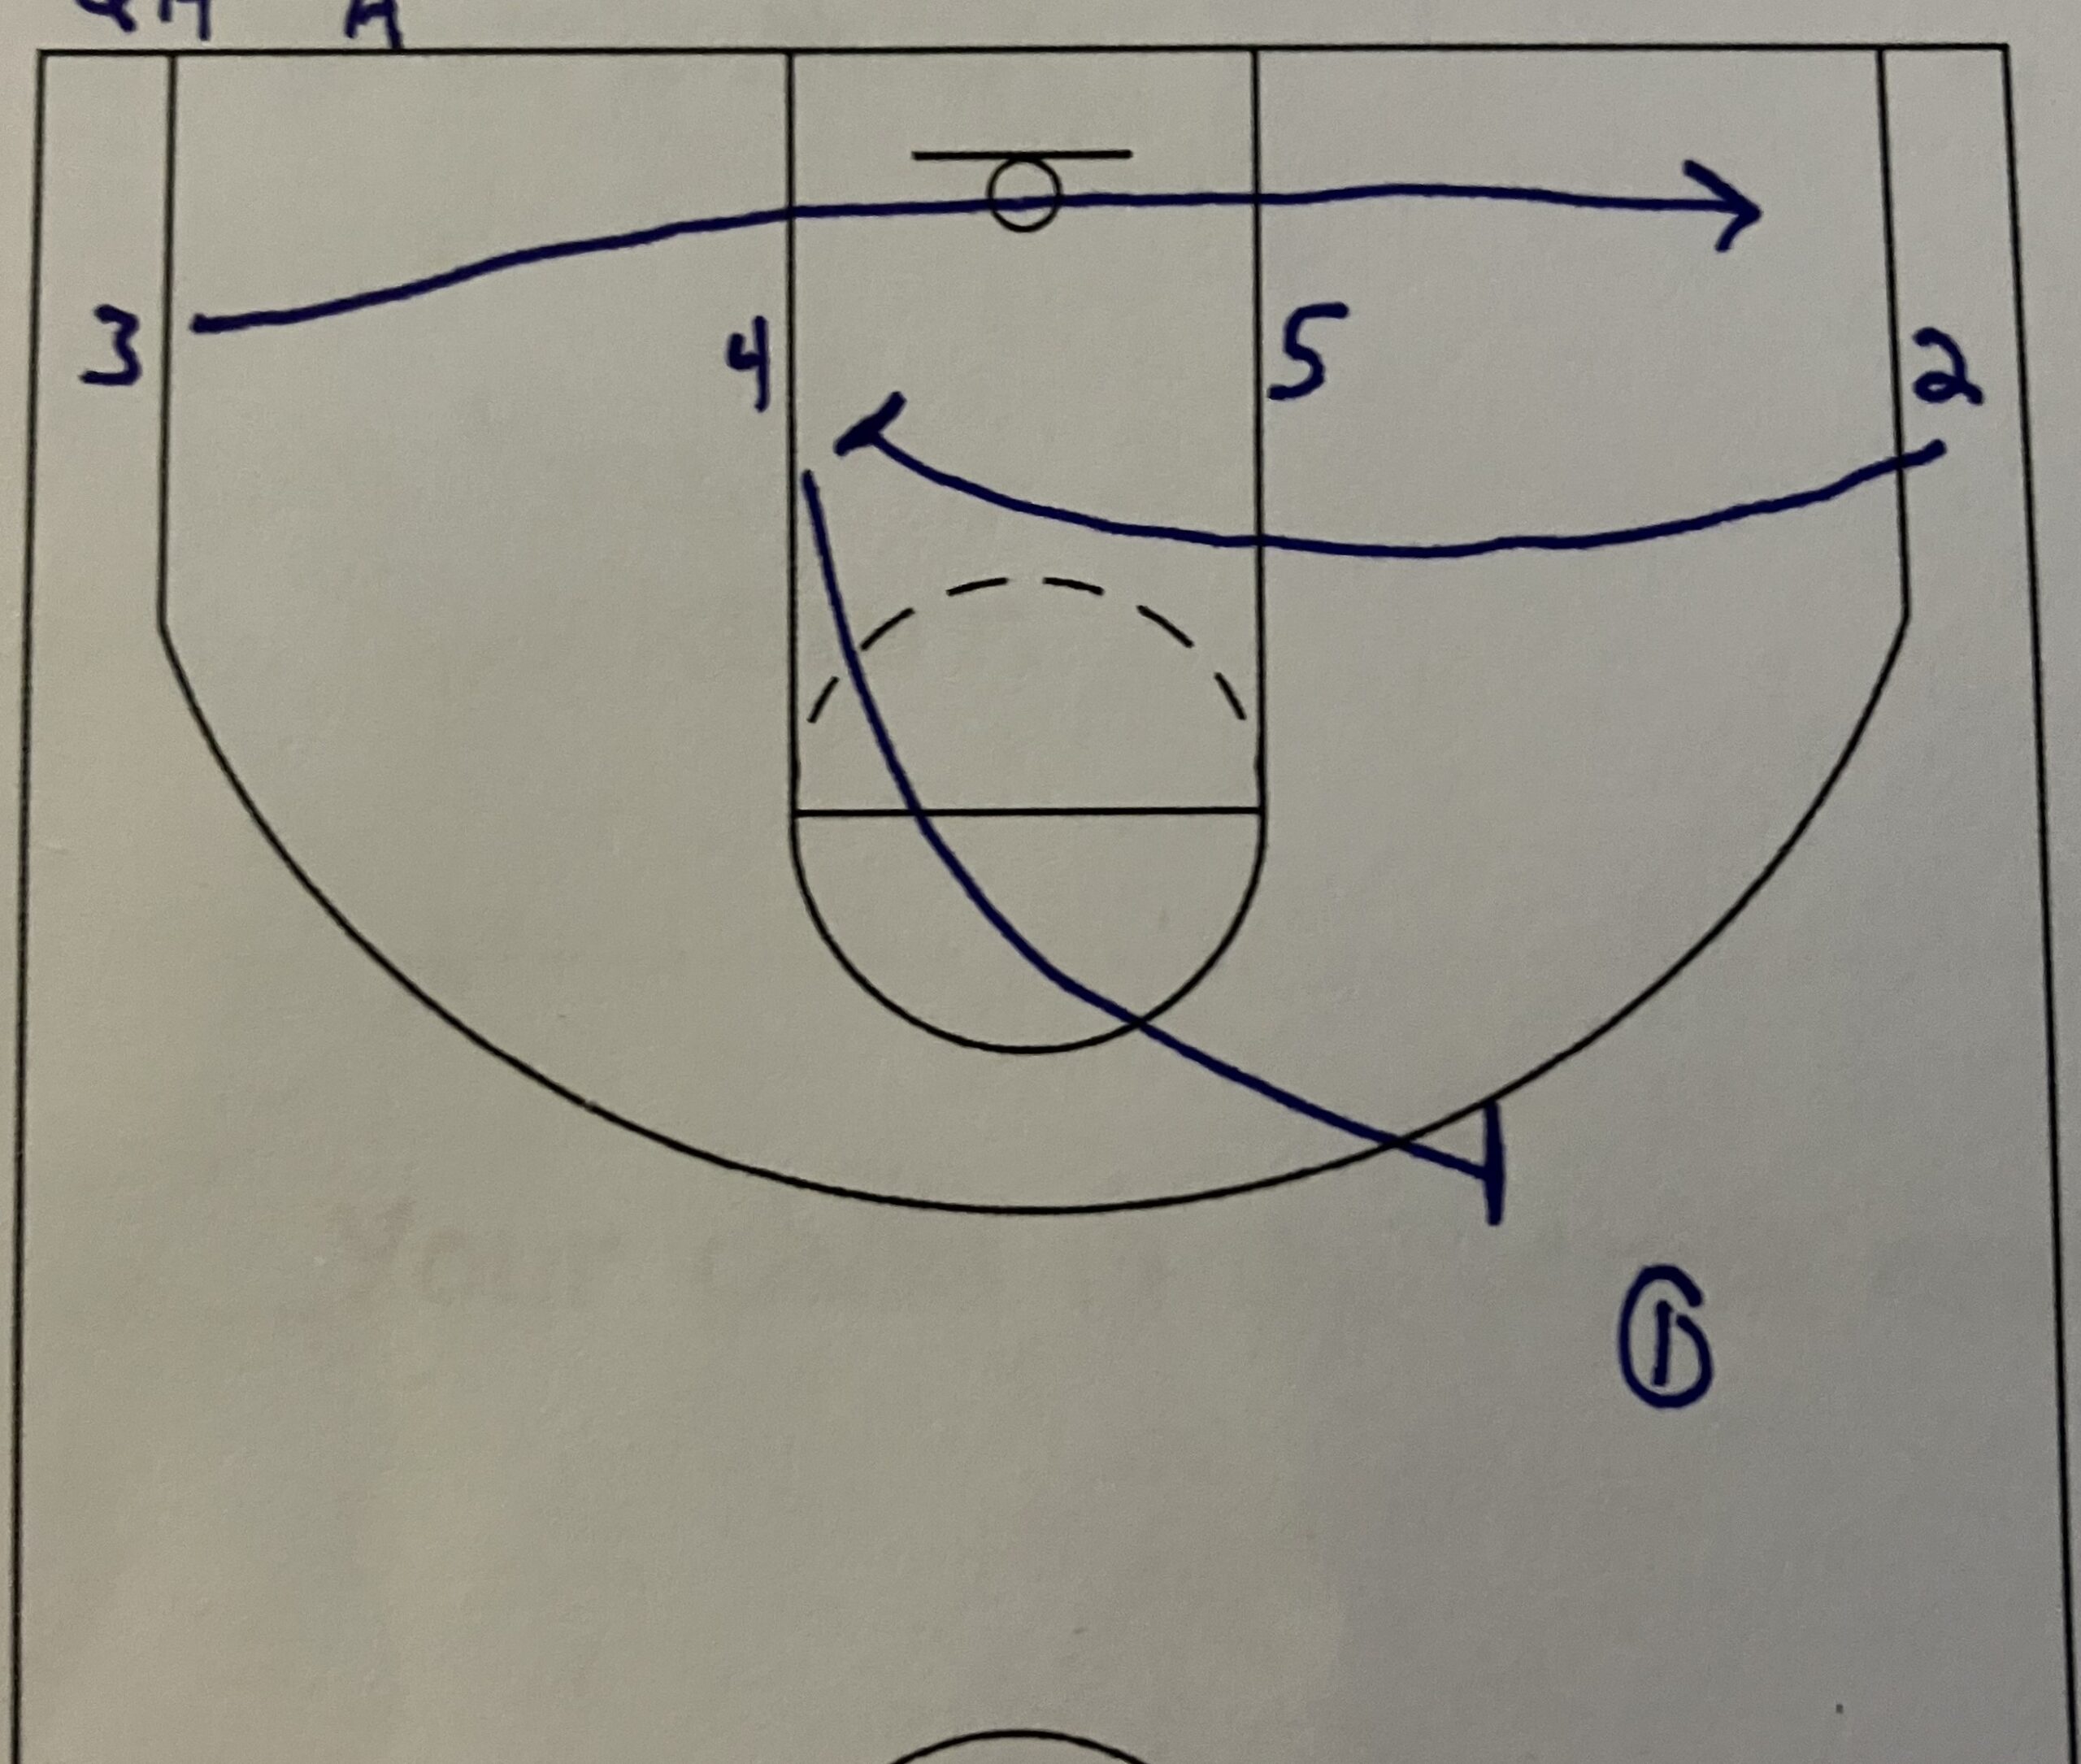
I use cones to help players understand where and how the trap is being applied. The cones are set in 3 spots. The first spot is on the sideline free throw line extended. The 2nd set of cones are on the jump circle in the middle of the floor. And the 3rd set of cones are on the other side of the floor right around the top of the key. The letter C’s on the diagrams are where the cones should be placed.
There are two cones set out for each set. The first cone is right in front of the dribbler. On the first set of cones, the 2nd cone is set towards the middle of the court and closer to the dribbler than the first cone.
On the 2nd set of cones, the 1st cone is set right on the half-court line with the 2nd cone on the side away from the middle and again closer to the dribbler.
The last set of cones is on the sideline right around the top of the key. The 3rd set of cones is set up just like the 1st set of 2 cones.

The two cones is simulating the two defenders in a trapping situation. The cones help to give the players a visual as to how and where the defenders are going to be positioned in a trap. Cones can be set up on both sides of the floor so one line can be going down one side of the floor while a 2nd line can be coming back up the other side. This can help to get players more reps during the drill.
The players will start in front of the first set of cones. Depending on what side the middle of the floor is on will determine which hand the players should begin dribbling with as the drill starts. The cones can be reverse sides to have the players switch which hand they start to dribble with as the drill begins. A player starting the drill on the left side of the floor should start with a left handed dribble and a player on the right side of the floor should start with a right handed dribble.
For this explanation, I will be having the players start on the left side of the floor and starting the drill with a left handed dribble. Everything can be switched for the right side and right hand.
The player will start dribbling with their left hand and sprint into the middle of the two cones. Once they get into the trap, the player should “put their butt into the trap.” This is going to cause the player to maneuver their body to help to give additional protection against the defenders trying to get steals. The body of the dribbler should be turned away from their basket. Their chin should be put onto their right shoulder with their eyes looking into the middle of the floor. The legs of the dribbler should be wide and bent. The dribble should be in between the two legs and low to the floor.
Now the back dribble is going to occur. Pushing off of the front foot, which would be the right foot, the player should explode quickly backwards away from the two cones. This should take one or two dribbles to create as much space as possible between the dribbler and the cones.
I do this as an individual dribbling drill, so the player turns and squares up to the offensive basket. Once square, the player will make a change of direction dribble such as a crossover or between the legs putting the ball into the right hand. With the ball now in the right hand, the player will sprint up into the middle of the floor into the 2nd set of cones.
The ball is now being dribbled with the right hand. The player will repeat the same actions as before. The player will turn their butt into the trap. They will be looking into the middle of the floor by putting their chin to their shoulder. The chin will now be on the left shoulder because of the right-handed dribble. The dribble will be in between the legs.
The player is going to explode back pushing off of the left foot which is now in the front. The player will take one or two dribbles backwards. They will turn and face the offensive basket. A change of direction dribble will put the ball back into the left hand. The player will then sprint up to the last set of cones.
The player will repeat the same steps and dribbles from the first set of cones. As they change direction after the back dribble, they are going to sprint to the basket for a layup. After the layup, the player will take the ball to the other side of the floor and repeat the drill coming back down the court. Or they will pass the ball to the next person and go to the back of the line.
The players can also attack the elbow and do a final change of direction dribble before shooting a layup or jumpshot. This last change of direction can put the ball back into the outside hand so the player is shooting a left-handed layup on the left side of the floor. This move at the elbow can help to re-enforce basketball fundamentals by having players dribble with their outside hand as they attack the basket.
This drill has the ability to have multiple players going through the drill and others waiting in line to begin the drill. It can also be continuously ran until you as the coach want to stop the drill. This will help to reduce down time in practice because the players should not be stopping except when in line waiting for their turn.
This is a great dribbling drill. This is a great way to remove pressure from a trap. The back dribble will help a team and players reduce the number of turnovers they are committing. When players effectively do a back dribble in a game, defenses will struggle to get good traps and the offense should have an advantage if the player is able to make a good pass after using the back dribble. This will help a team punish an aggressive pressure style defense.
Players can panic when being trapped if they do not know what to do. By practicing the back dribble, it will be a reaction play by players when they are getting trapped. By knowing what to do, the players will not panic. They will remain calm and make a good pass after using the back dribble to get out of the pressure of the trap.
The ability to stay calm and not panic will reduce turnovers. A reduction in turnovers prevents the opponents from getting easy baskets. It allows a team to more readily set their half-court defense after each offensive possession. It gives a team a better chance to win every game.
This drill can be done every practice or every other practice in 5 minutes. When the players take the drill and apply it to the game, then the benefits of the drill will be well worth all of the practice time it has taken. Defensive presses and trapping will be broken to the point where opponents will be unable to press your team. Opponents will struggle to get back into games when they are trailing in the 4th quarter because they can not turn you over so they can not get easy points. This drill will help to close out late games when you are ahead which will lead to more wins. That is reason alone to add this drill into your practices.
15 thoughts on “Back Dribbles Out of Traps”