One of the first dribbling drills most players are going to learn how to do as they start to learn how to dribble is going through cones. Dribbling with cones gives players a visual cue as to where and when to change direction. The cones can be spread far apart to give the players time in between each cone to gather themselves up for the next cone. Or the cones can be placed close together to reduce the amount of space the player has to dribble, meaning the player must be more precise with their movement and ball handling.
The dribbling can be simple for young or inexperienced players like just using one hand. Then as the player gains more comfort with dribbling with both hands, they can start to do change of direction dribbles like the crossover and between the legs. As the players keep getting better then double and triple moves can be introduced to keep challenging players as they get older and better. The great thing about using cones to help with dribbling is the ability to keep changing things to keep the players improving.
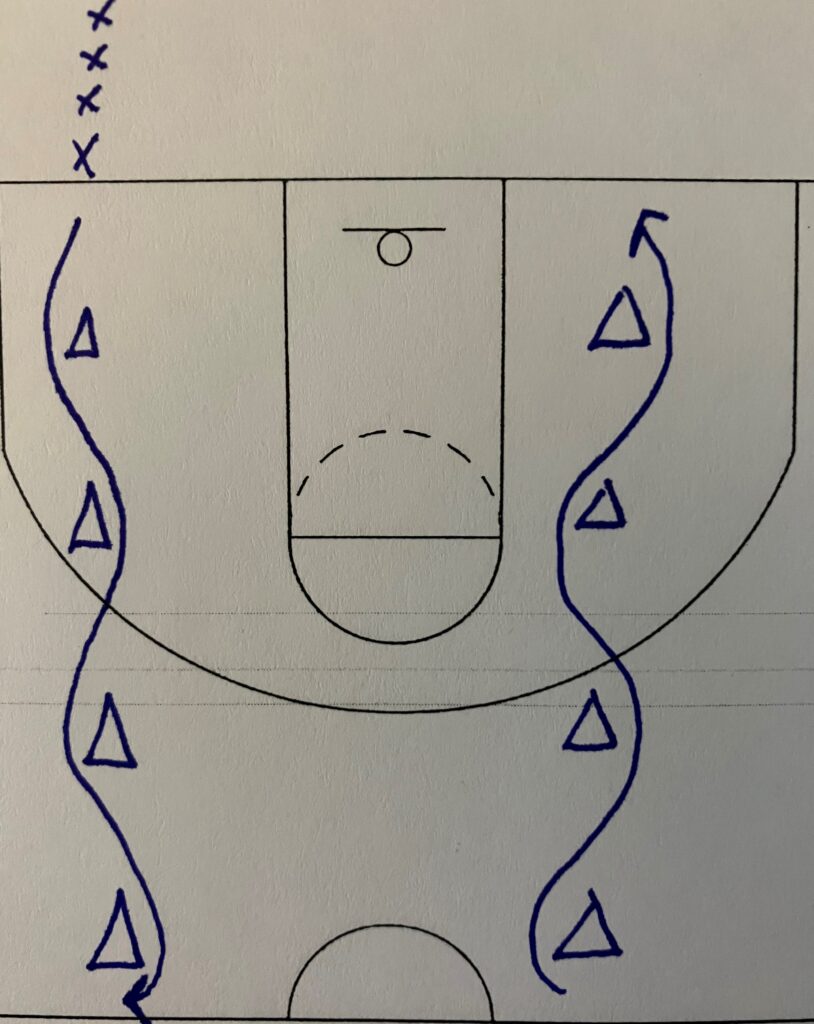
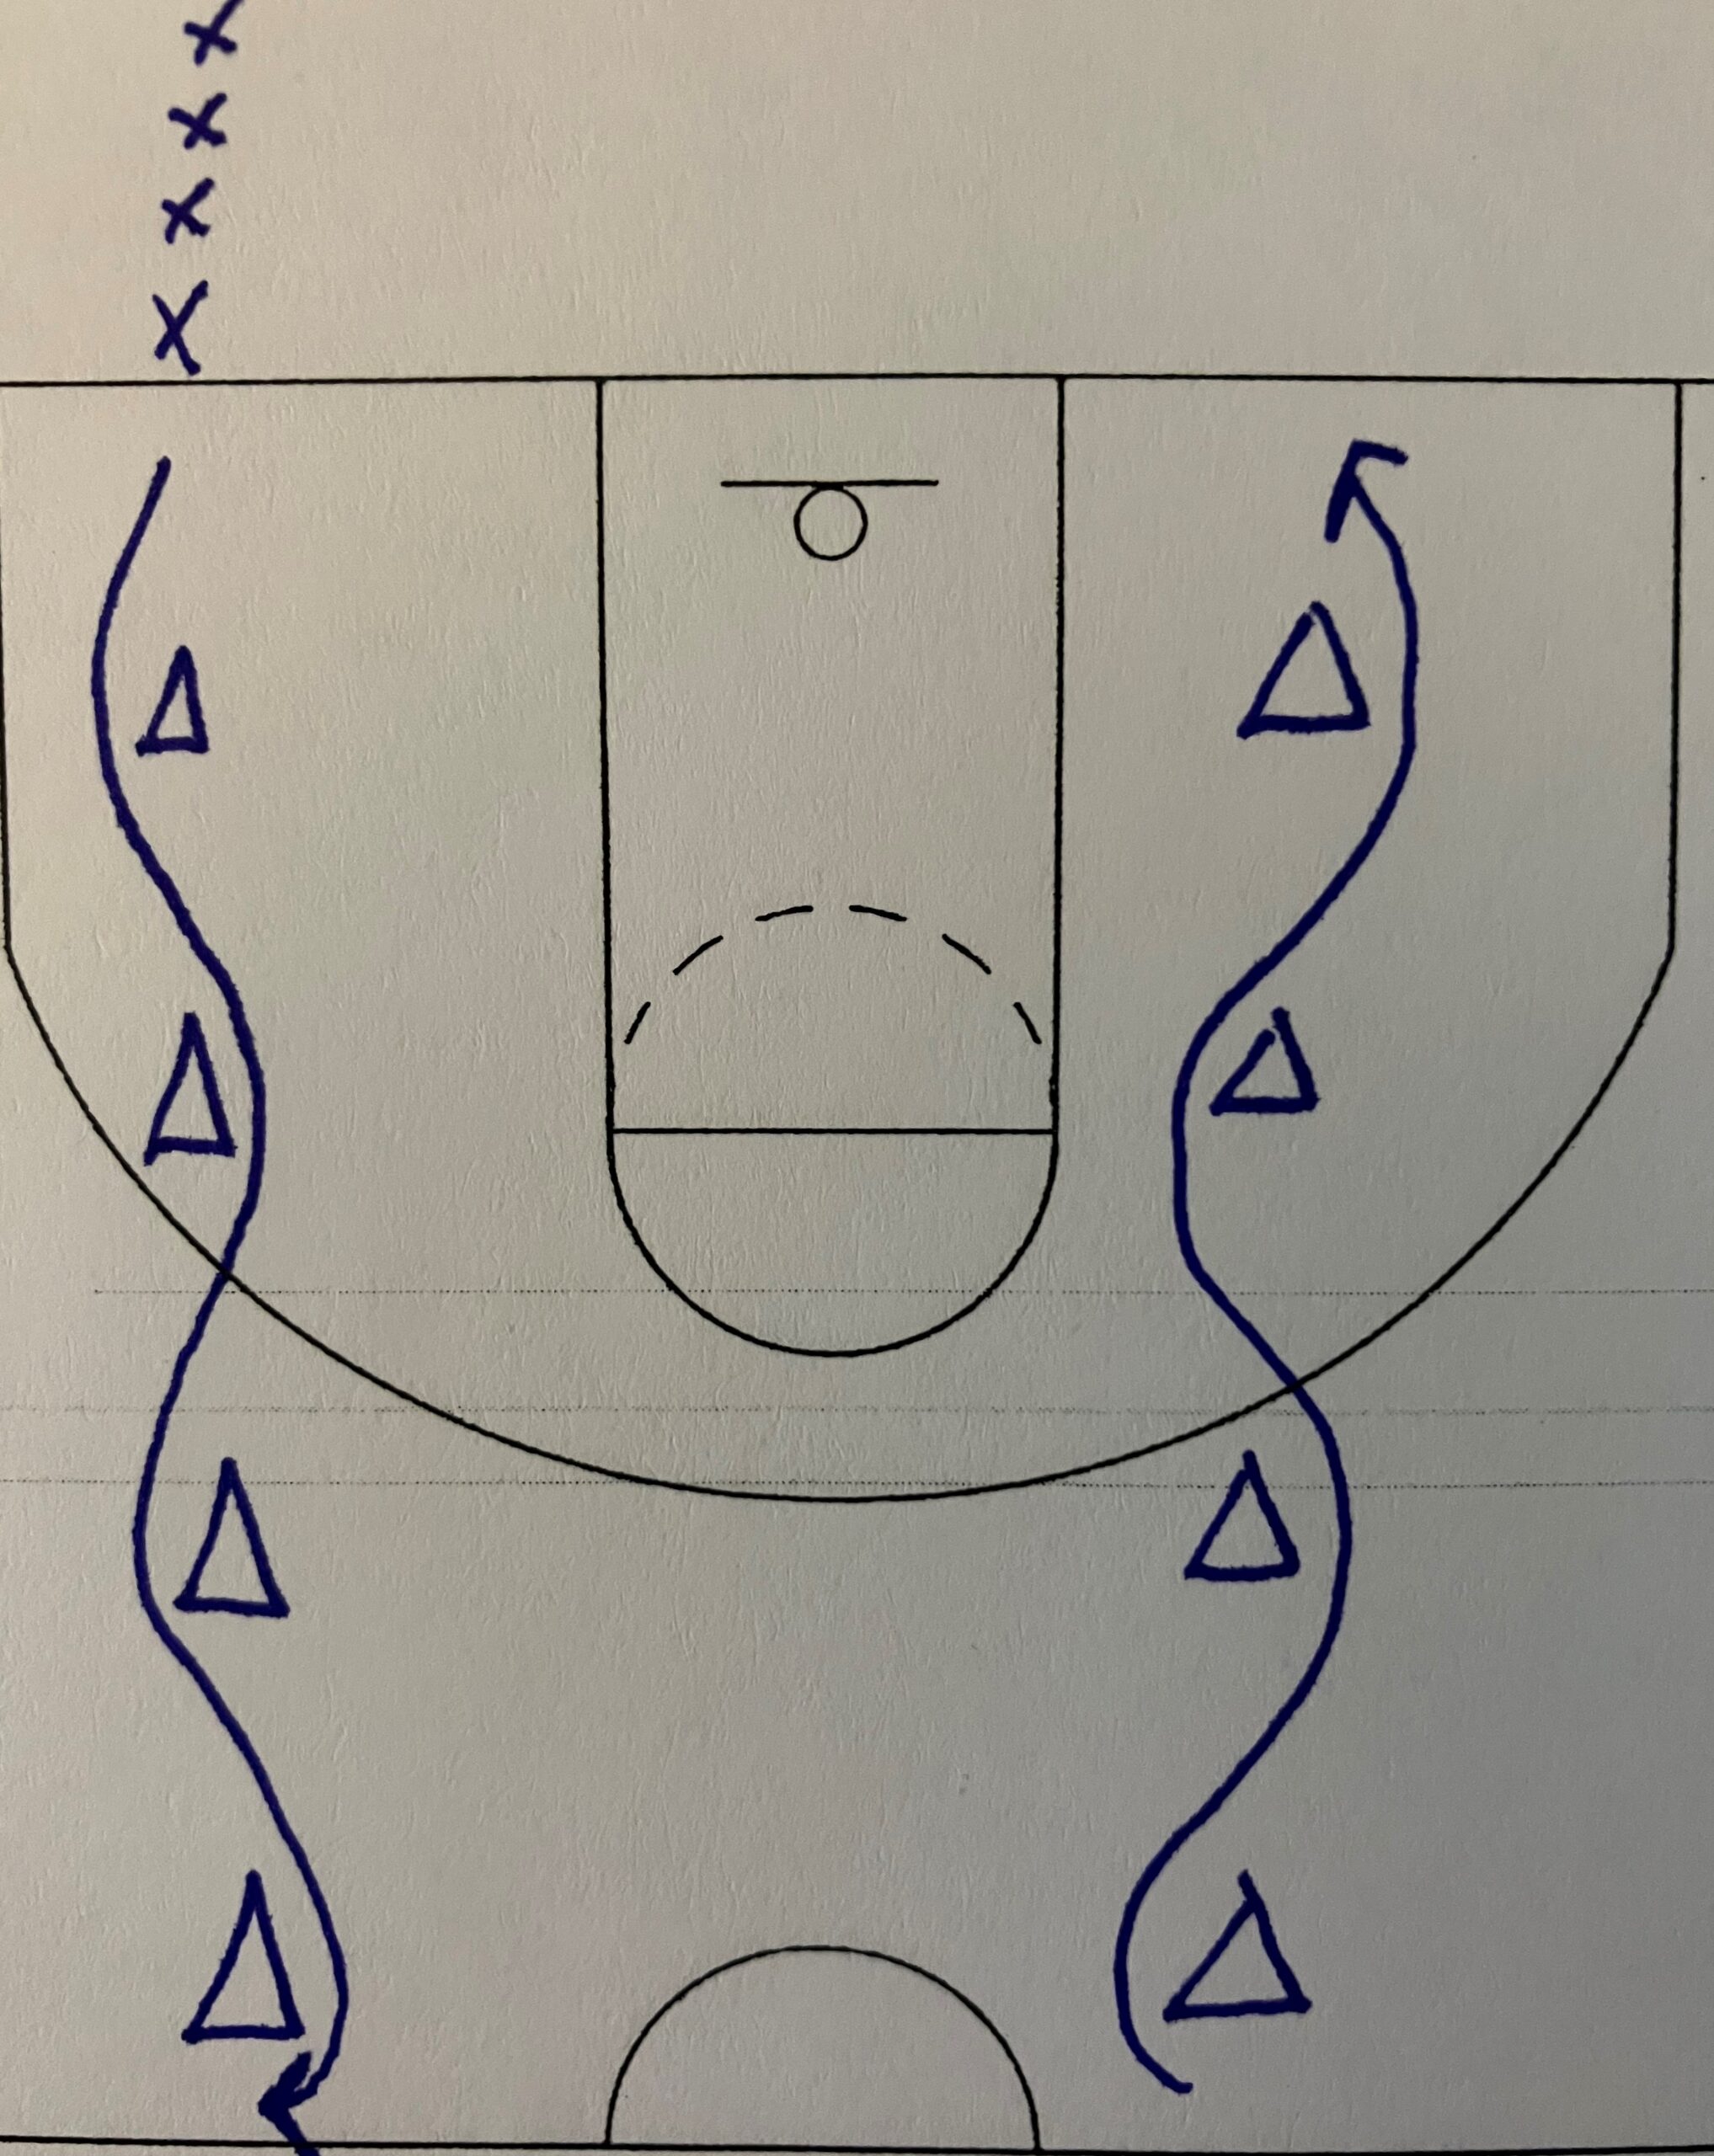
This would be the first drill of dribbling through cones for most players. Four cones lined up and a line of dribblers in front of the cones. I have two sets of cones in the diagram. This is to make it clear the route of the dribbler. But you could have two sets of cones for two lines of dribblers or a set of cones dribbling toward half-court and a set for coming back. Depending on how you set up the drill will determine the proper route of the players.
At a young age, this drill may start with just a right hand dribble through the entire drill. And then a left hand dribble throughout the entire set of cones. That could then change to right hand going to half-court and left hand coming back. Once the players start to get better or get older, then it could be to do a crossover at each cone. Then behind the back and between the legs could be put into the drill as the skill level of the players continues to increase over time. The level of difficulty can be increased over time so the drill remains familiar to the players even though the basketball skills keep changing.
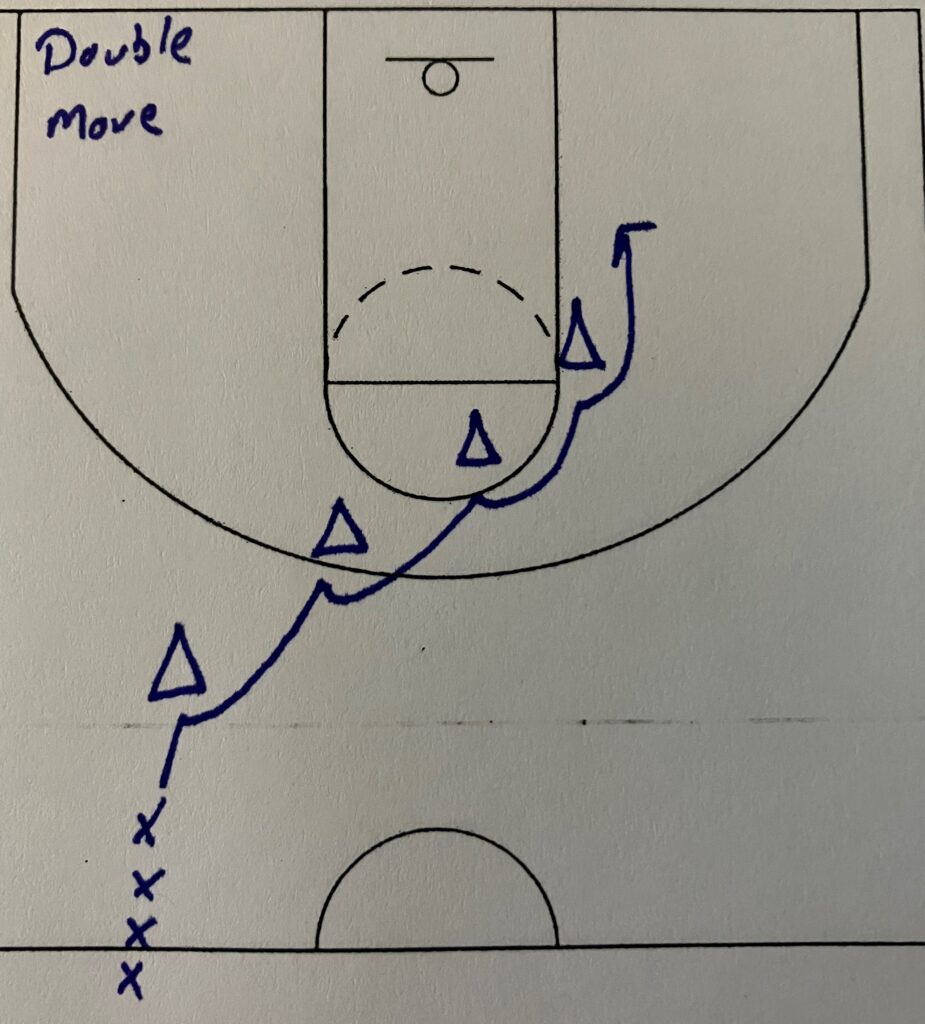
This is the next type of dribbling through cones. Now I am adding a shot or layup at the end of the cones so we can work on some shooting as well as the dribbling. The players start on one side of the court. The cones are set staggered down towards the basket. This can be done from either side and I will always go through the drill in this setup and then flip everything to work on both hands.
The ball will start in the right hand as the player approaches the first cone. The player will perform a double move. Using the four change of direction dribbles, there are roughly 16 combinations of double moves you can do. For example this could be a crossover-crossover; crossover-between the legs; behind the back-crossover; etc. The combinations and when to do them are endless. For example, using the four cone diagram above, a player could do crossover-crossover at the first cone, crossover-behind the back at the 2nd cone, crossover-between the legs at the 3rd cone and crossover-spin at the last cone before shooting a shot after the spin. One trip through and a player has used all 4 change of direction dribbles. The ability to be creative in what dribbles to use can help increase the difficulty of the drill.
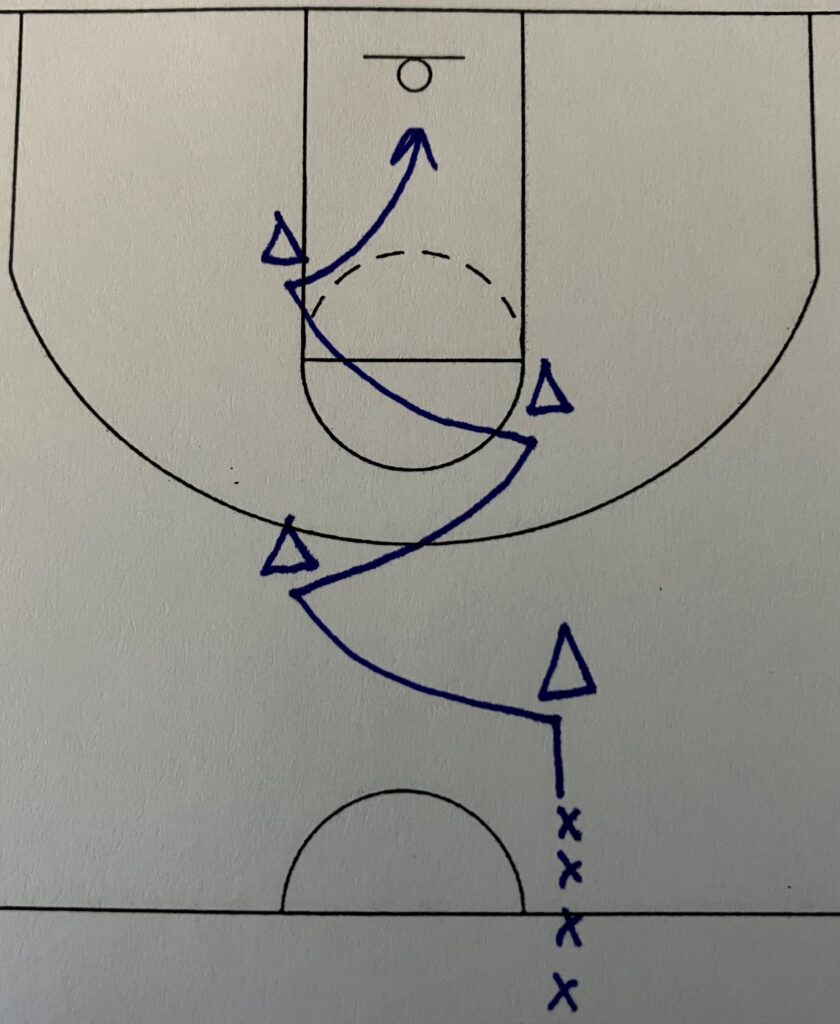
The last variation I am going to put in is above. Four cones are set no farther than lane width on the court. The players start on one side and will zig zag back and forth before finishing the drill with a shot. Again the cones can be moved closer to the basket so the player has to do four change of direction dribbles very quickly or they can be spaced farther apart to work on coming at a defender and exploding past them quickly. The focus of the drill can change depending on the space the players have to complete the drill.
One of the things I like to do in this setup is to have the players work on triple moves. Triple moves are 3 change of direction dribbles before moving onto the next cone. At the high school level, most players are able to do a single move through the cones without difficulty. Again taking a simple drill and elevating it to make it more difficult. The same players who do the single moves easily can struggle at first doing a triple move. The better ball handlers like the guards tend to pick it up quickly but it is a challenge for them. Some post players can and do struggle for a long period of time before they become comfortable doing a triple move.
This cone setup can be done with 1st and 2nd graders using only a crossover move all the way up to a high school senior doing a triple move at each cone. Both the 1st grader and high school senior can benefit from the drill because the drill has evolved along with the skill level and age of the player.
These 3 setups are ones that I use but they are not the only 3 cone setups there are. I use other cone setups in addition to these 3. Using and dribbling through cones can be beneficial for all age groups. Let me know in the comments if there is a particular cone setup that you use and have found to be most beneficial to your players and team.

12 thoughts on “Dribbling Through Cones”